用Cursor IDE 來開發Android可行性
2025, Mar 24
實際效果
- 基於前面分享的用Cursor IDE 來輔助開發code
- 實測
Cursor (vscode)取代Android Studio的可行性 - 直接跳到後面看結論
為Cursor (vscode) 啟動手機模擬器
透過自己手動開啟
- 安裝Android tool
emulator- 通常安裝
Android Studio時,整包就會預設安裝emulator了 - 現在要在環境中使用,所以你必需找到對應的路徑,加入環境變數中
- Windows 加入到
環境變數中C:\Users\你的用戶名\AppData\Local\Android\Sdk\emulator - MacOS 加入到
.zshrc末尾export ANDROID_HOME=$HOME/Library/Android/sdk export PATH=$ANDROID_HOME/emulator:$ANDROID_HOME/tools:$ANDROID_HOME/tools/bin:$ANDROID_HOME/platform-tools:$PATH
- 通常安裝
- 使用以下指令列出環境中
可用的AVD模擬器emulator -list-avds - 用emulator啟動模擬器
emulator -avd Pixel_7_API_33
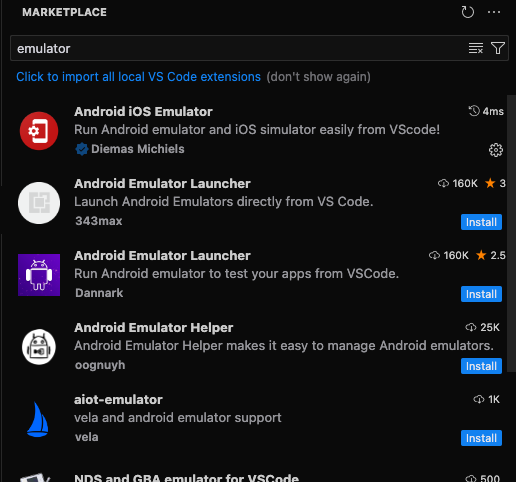
使用插件開啟模擬器
-
到marketplace下載emulator插件
-
以上圖這款為例,按下
win/command + shift + p打開IDE的指令欄,輸入emulator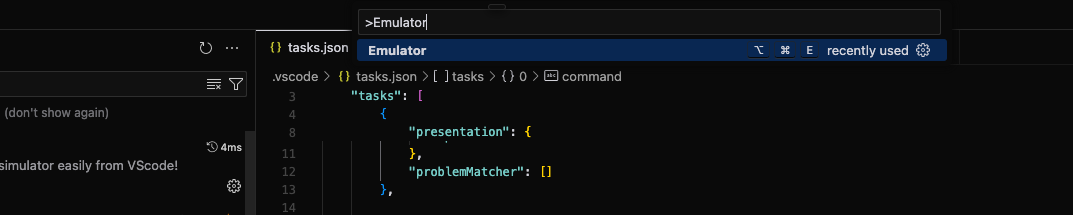
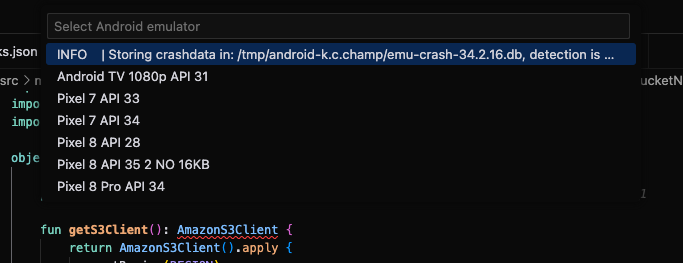
-
之後按下enter後跟著步驟走選擇要用的模擬器,即可
在Cursor中能一鍵Build Android apk嗎?
透過launch.json一鍵建構
- 老樣子,在 根目錄 下建立:
.vscode/launch.json
並請IDE或AI幫你直接產生
加入launch腳本內容
{
    "version": "0.2.0",
    "configurations": [
        {
            "type": "android",
            "request": "launch",
            "name": "Android launch",
            "appSrcRoot": "${workspaceRoot}/app/src/main",
            "apkFile": "${workspaceRoot}/app/build/outputs/apk/debug/app-debug.apk",
            "adbPort": 5037
        },
        {
            "type": "android",
            "request": "attach",
            "name": "Android attach",
            "appSrcRoot": "${workspaceRoot}/app/src/main",
            "adbPort": 5037,
            "processId": "${command:PickAndroidProcess}"
        }
    ]
}
- 不過目前測下來,支援度在
native android沒那麼全
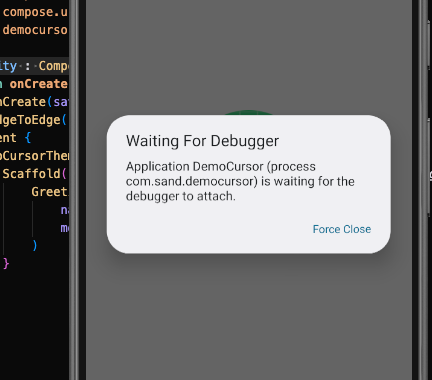
例如:使用name為Android launch的腳本
打開app時會進入waitting for debugger
但Cursor IDE又沒有android studio的debug工具 可以往下一步
使用Cursor (vscode)的debug action似乎無效
透過task.json來建構
透過自定義task
比較能用到過去常常在Android開發用到的工具來當指令
建構整個工作流程
例如adb, gradle, logcat …等等
- 在 根目錄 下建立:
.vscode/task.json,並請AI幫你直接產生相關內容
這邊我放一個常用的(每個json object都是一個task),有需要可以參考,
(部分參數可以替換,或請AI幫你產成非hardcode,例如下方Pixel_7_API_33, package name…等)
{
  "version": "2.0.0",
  "tasks": [
    {
      "label": "啟動 Android 模擬器",
      "type": "shell",
      "command": "emulator -avd Pixel_7_API_33",
      "presentation": {
        "reveal": "always",
        "panel": "new"
      },
      "problemMatcher": []
    },
    {
      "label": "列出連接的裝置",
      "type": "shell",
      "command": "adb devices",
      "presentation": {
        "reveal": "always",
        "panel": "new"
      },
      "problemMatcher": []
    },
    {
      "label": "Build Debug APK",
      "type": "shell",
      "command": "./gradlew assembleDebug",
      "group": {
        "kind": "build",
        "isDefault": true
      },
      "problemMatcher": []
    },
    {
      "label": "Install Debug APK (預設裝置)",
      "type": "shell",
      "command": "./gradlew installDebug",
      "group": "build",
      "problemMatcher": []
    },
    {
      "label": "Install Debug APK (指定裝置)",
      "type": "shell",
      "command": "adb -s ${input:deviceSerial} install -r ./app/build/outputs/apk/debug/app-debug.apk",
      "group": "build",
      "problemMatcher": [],
      "presentation": {
        "reveal": "always",
        "panel": "new"
      }
    },
    {
      "label": "Build & Install Debug APK (預設裝置)",
      "dependsOn": [
        "Build Debug APK",
        "Install Debug APK (預設裝置)"
      ],
      "group": "build",
      "problemMatcher": []
    },
    {
      "label": "Build & Install Debug APK (指定裝置)",
      "type": "shell",
      "command": "./gradlew assembleDebug && adb -s ${input:deviceSerial} install -r ./app/build/outputs/apk/debug/app-debug.apk",
      "group": "build",
      "problemMatcher": [],
      "presentation": {
        "reveal": "always",
        "panel": "new"
      }
    },
    {
      "label": "Clean Project",
      "type": "shell",
      "command": "./gradlew clean",
      "group": "build",
      "problemMatcher": []
    },
    {
      "label": "Show Logcat (所有日誌)",
      "type": "shell",
      "command": "adb logcat",
      "group": "none",
      "problemMatcher": [],
      "presentation": {
        "reveal": "always",
        "panel": "dedicated"
      },
      "isBackground": true
    },
    {
      "label": "Show Logcat (應用程式日誌)",
      "type": "shell",
      "command": "adb logcat | grep \"com.sand.democursor\"",
      "group": "none",
      "problemMatcher": [],
      "presentation": {
        "reveal": "always",
        "panel": "dedicated"
      },
      "isBackground": true
    },
    {
      "label": "Show Logcat (指定裝置)",
      "type": "shell",
      "command": "adb -s ${input:deviceSerial} logcat | grep \"com.sand.democursor\"",
      "group": "none",
      "problemMatcher": [],
      "presentation": {
        "reveal": "always",
        "panel": "dedicated"
      },
      "isBackground": true
    },
    {
      "label": "Full Clean and Build",
      "type": "shell",
      "command": "./gradlew clean assembleDebug --stacktrace",
      "group": "build",
      "problemMatcher": [],
      "presentation": {
        "reveal": "always",
        "panel": "new"
      }
    },
    {
      "label": "Run App (預設裝置)",
      "type": "shell",
      "command": "adb shell am start -n com.sand.democursor/com.sand.democursor.MainActivity",
      "dependsOn": [
        "Build & Install Debug APK (預設裝置)"
      ],
      "group": "build",
      "problemMatcher": [],
      "presentation": {
        "reveal": "always",
        "panel": "new"
      }
    },
    {
      "label": "Run App (指定裝置)",
      "type": "shell",
      "command": "adb -s ${input:deviceSerial} shell am start -n com.sand.democursor/com.sand.democursor.MainActivity",
      "dependsOn": [
        "Build & Install Debug APK (指定裝置)"
      ],
      "group": "build",
      "problemMatcher": [],
      "presentation": {
        "reveal": "always",
        "panel": "new"
      }
    },
    {
      "label": "Full Development Setup (模擬器)",
      "dependsOn": [
        "啟動 Android 模擬器",
        "Build & Install Debug APK (預設裝置)",
        "Run App (預設裝置)"
      ],
      "group": "build",
      "problemMatcher": []
    },
    {
      "label": "Full Development Setup (指定裝置)",
      "dependsOn": [
        "Build & Install Debug APK (指定裝置)",
        "Run App (指定裝置)"
      ],
      "group": "build",
      "problemMatcher": []
    },
    {
      "label": "一鍵構建安裝啟動 (選擇裝置)",
      "type": "shell",
      "command": "bash -c 'deviceList=$(adb devices | grep -v \"List of devices\" | grep -v \"^$\" | grep -v \"offline\" | grep -v \"unauthorized\"); if [ -z \"$deviceList\" ]; then echo \"找不到連接的設備\"; exit 1; fi; PS3=\"選擇設備編號: \"; devices=(); while read -r line; do if [ ! -z \"$line\" ]; then device=$(echo $line | awk \"{print \\$1}\"); devices+=(\"$device\"); fi; done <<< \"$deviceList\"; select device in \"${devices[@]}\"; do if [ ! -z \"$device\" ]; then echo \"選擇的設備: $device\"; echo \"正在構建 APK...\"; ./gradlew assembleDebug; echo \"正在安裝 APK 到設備 $device...\"; adb -s $device install -r ./app/build/outputs/apk/debug/app-debug.apk; echo \"正在啟動應用程式...\"; adb -s $device shell am start -n com.sand.democursor/com.sand.democursor.MainActivity; break; fi; done'",
      "group": {
        "kind": "build",
        "isDefault": true
      },
      "problemMatcher": [],
      "presentation": {
        "reveal": "always",
        "panel": "new",
        "focus": true
      }
    },
    {
      "label": "Generate APK Bundle",
      "type": "shell",
      "command": "./gradlew bundleRelease",
      "group": "build",
      "problemMatcher": [],
      "presentation": {
        "reveal": "always",
        "panel": "new"
      }
    },
    {
      "label": "Build Release APK",
      "type": "shell",
      "command": "./gradlew assembleRelease",
      "group": "build",
      "problemMatcher": []
    },
    {
      "label": "Install Release APK (指定裝置)",
      "type": "shell",
      "command": "adb -s ${input:deviceSerial} install -r ./app/build/outputs/apk/release/app-release.apk",
      "group": "build",
      "problemMatcher": [],
      "presentation": {
        "reveal": "always",
        "panel": "new"
      }
    },
    {
      "label": "Run Tests",
      "type": "shell",
      "command": "./gradlew test",
      "group": "test",
      "problemMatcher": []
    },
    {
      "label": "Kill ADB Server",
      "type": "shell",
      "command": "adb kill-server",
      "group": "none",
      "problemMatcher": []
    },
    {
      "label": "Start ADB Server",
      "type": "shell",
      "command": "adb start-server",
      "group": "none",
      "problemMatcher": []
    },
    {
      "label": "Restart ADB Server",
      "dependsOn": [
        "Kill ADB Server",
        "Start ADB Server"
      ],
      "group": "none",
      "problemMatcher": []
    },
    {
      "label": "Run App Without Debug Wait",
      "type": "shell",
      "command": "adb shell am start -n com.sand.democursor/com.sand.democursor.MainActivity --ei 'wait_for_debugger' 0",
      "group": "build",
      "problemMatcher": []
    }
  ],
  "inputs": [
    {
      "id": "deviceSerial",
      "type": "promptString",
      "description": "請輸入目標設備的序列號 (使用 'adb devices' 命令可查詢)"
    }
  ]
}
-
接著使用快捷鍵
win/command+shift+p打開輸入匡後輸入Run Task,接著按下Enter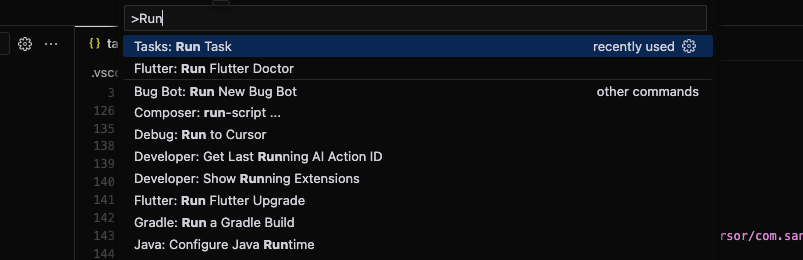
-
最終可以根據自己的需求,客製build flow
Android Studio常用快捷鍵在Cursor中能用嗎?
整行上/下移
- 開發時,常會需要調整程式碼的位置,或移到其他行測試效果
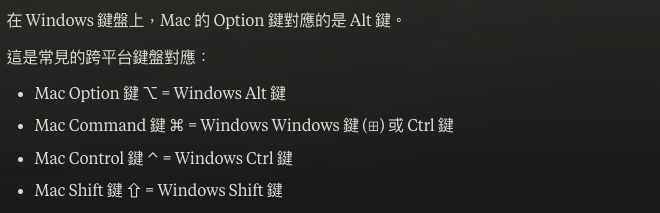
- 在
AS用win/command+shift+↑/↓
- Cursor(vscode) 則使用
alt/option+↑/↓
- 在
複製整行
- 有時候類似的代碼,想要快速複製整行
- 在
AS用win/command+D
- Cursor(vscode) 用
win/command+shift+D
- 在
快速補全/提示
- 以前在Android Studio常用的快速補全
- 在
AS用Alt/option+Enter - Cursor(vscode) 用
win/command+.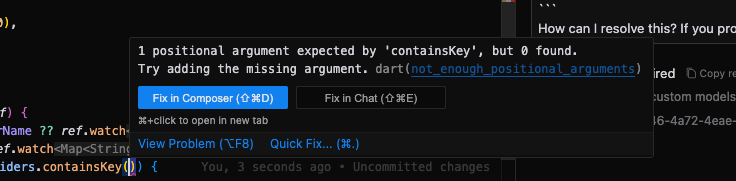
- 在
在Cursor上純開發Android的優缺點
優點
- 使用Cursor內建AI工具,達成透過prompt編寫程式碼
- 輕量化
- 不像 Android Studio 這麼吃資源,適合低配設備。
- 啟動速度快
- 更高的自定義性
- 可以手動配置
tasks.json、launch.json,完全依照需求客製化。 - 可透過插件擴展部分功能,例如 Kotlin 、ADB 操作等。
- 可以手動配置
- 專注於純粹的程式碼編寫
- 適合
熟悉指令操作的開發者。
- 適合
缺點
- 需要手動建構開發工作流
- Android Studio 原生支援的 Build, Run, Debug 等流程,在 Cursor 需要自行設定 tasks.json、launch.json。
- 部分功能不支援,較適合熟悉這些內容的開發者
- 例如 ViewBinding、DataBinding、Layout Inspector 等常用功能
- 缺乏 UI 設計工具
- 無法像 Android Studio 那樣直接拖拉設計 UI,需要全手寫 XML 或 Jetpack Compose,(若是熟悉這些的也是沒差)。
- Gradle Sync & Build 可能較為麻煩
- 需要手動執行 Gradle Sync,或寫腳本去測。
- 模擬器與設備管理較弱
- 需手動開啟,或寫腳本去跑
- Debug 體驗較差
- Android Studio 提供完整的 Logcat 監控、Breakpoint 偵錯,而 Cursor 的 Debugger實測後似乎不能用在Android native上面
- wait-for-debugger 問題。
故目前還是推薦Cursor, AS兩者交替使用, 除非已經都很熟悉,就當作純編輯器搭配AI來使用
其他
mac / win 鍵盤對應