Want to Increase Website Revenue? Learn How to Add Google AdSense to Your Site - Tutorial
Introduction
Today's article
will explain step by step
what google adsense is
and provide a hands-on tutorial on how to earn revenue by placing ads
Google AdSense Tutorial
What is Google AdSense?
First, for those who don't know what adsense is
it is a service provided by Google for advertisers to place ads
In other words, if a company wants to place ads through Google's ad placement service
they need someone to expose the ads
By using adsense
you can become the person who publishes ads for Google
and earn a share of the revenue
For example
you can publish ads on your website in the following style:
{% include google/adsense/ad_subject.html %}
If you still don't understand
I think the best way to explain
is with a picture
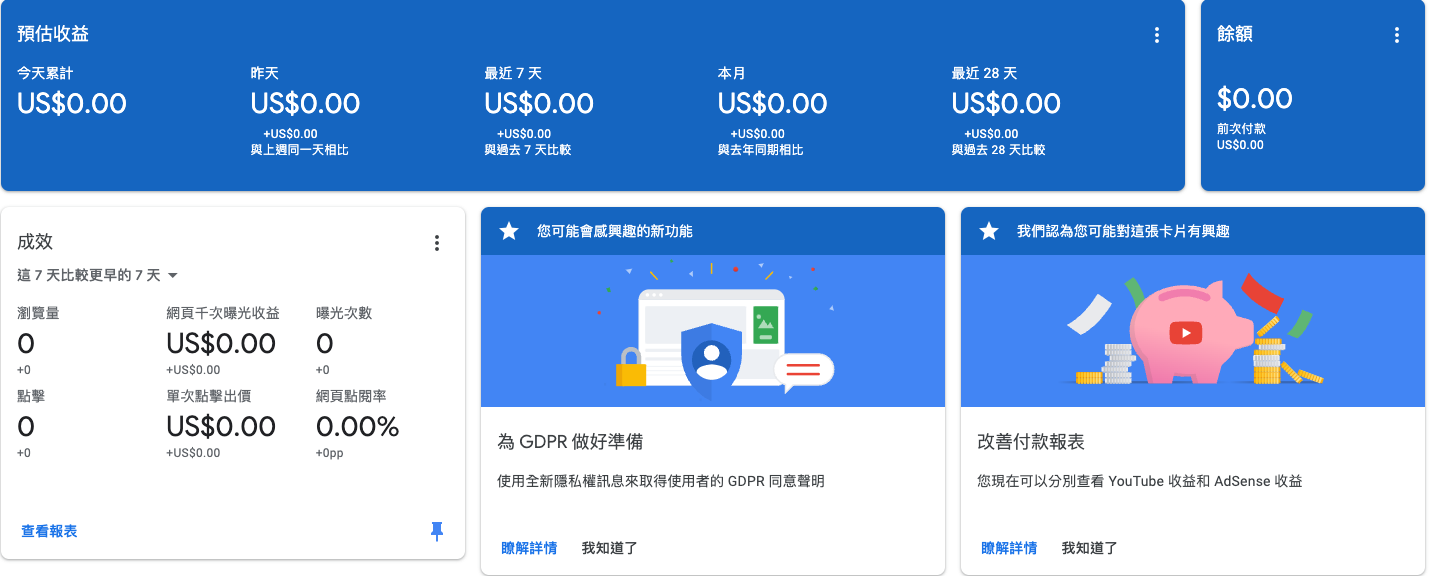
That's right
this picture is a screenshot of the Google AdSense homepage
It shows the statistics, actual revenue, balance, etc., for the ads you publish for Google
If you want to see this page, you can follow the steps below XD
Step 1 - Pass the Review
Start Registration
First, you need to go to to register an account
Add Your Website
Next, after entering the webpagefind the Sites option on the left
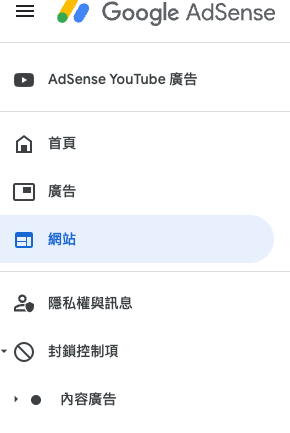
You will see a button on the right Add Site that allows you to add your website, click it

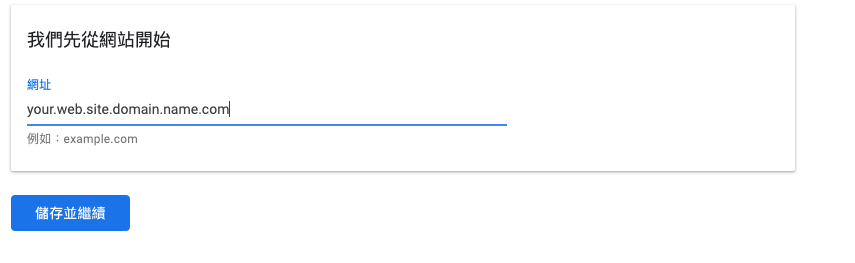
Next
you will see a page
asking you to enter your domain name (*Note 1)
(or commonly known as URL, website address, etc.)
After entering, click Save and Continue
Add HTML Code to Head and Request Review
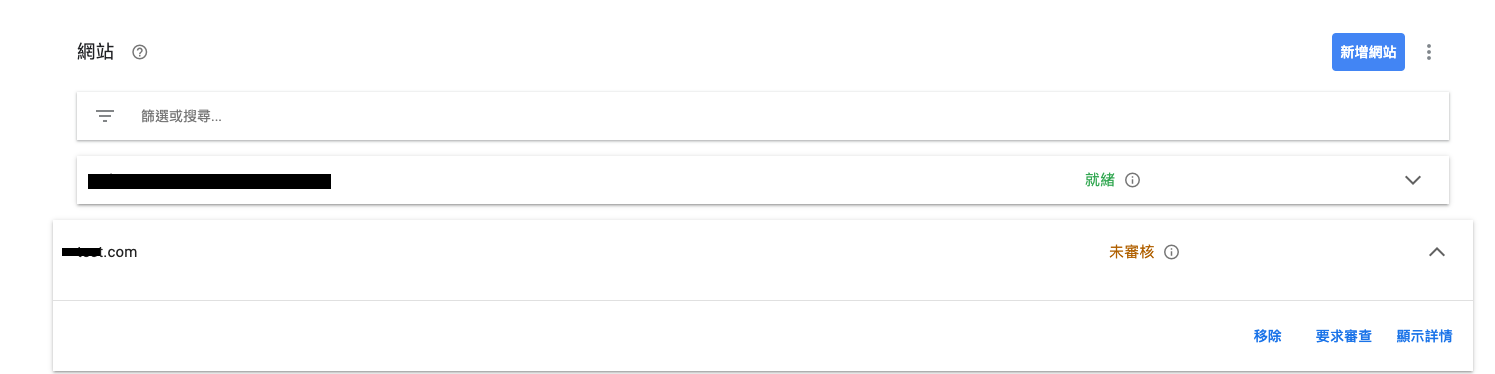
At this point, if
your website passes the Google scan successfully
you will be returned to the previous page
and the URL you just entered will be added
Usually, the first entry will be in unreviewed status
You might see a string of code
You need to add it to the <head> tag of your website
because Google needs to review your website for the first time
to check if it meets the requirements, if there is any strange content, if the content is too little, etc.
So if you confirm that your website is okay and you have added the required code
click the Request Review button at the bottom right
Then wait for a few hours or 1-2 days
Google will send you an email
informing you whether the review was successful
Review Successful
You will receive a letter similar to the one below upon success
Step 2 - Define Ads
Once you pass the review
You can start placing ads on your website
Click Ads on the left side of the website to see the screen below

By Site - Official Automatic Ad Placement
By Site will automatically insert ads into your website
This way, you don't have to modify the code yourself
But you also can't decide the ad placement
So, to make the website look less odd
You might consider using By Ad Unit to place ads
Method:
On the By Site page, find the URL you want to place ads on and click the Edit Icon
After entering, turn on the Auto Ads toggle button on the right
Ads will be automatically placed on your website within 1-2 hours
By Ad Unit - Custom Ad Placement
After clicking By Ad Unit, you will see the screen below

There are four types of ad styles available for you to use
Choose any one you want to see
For example, Display Ads
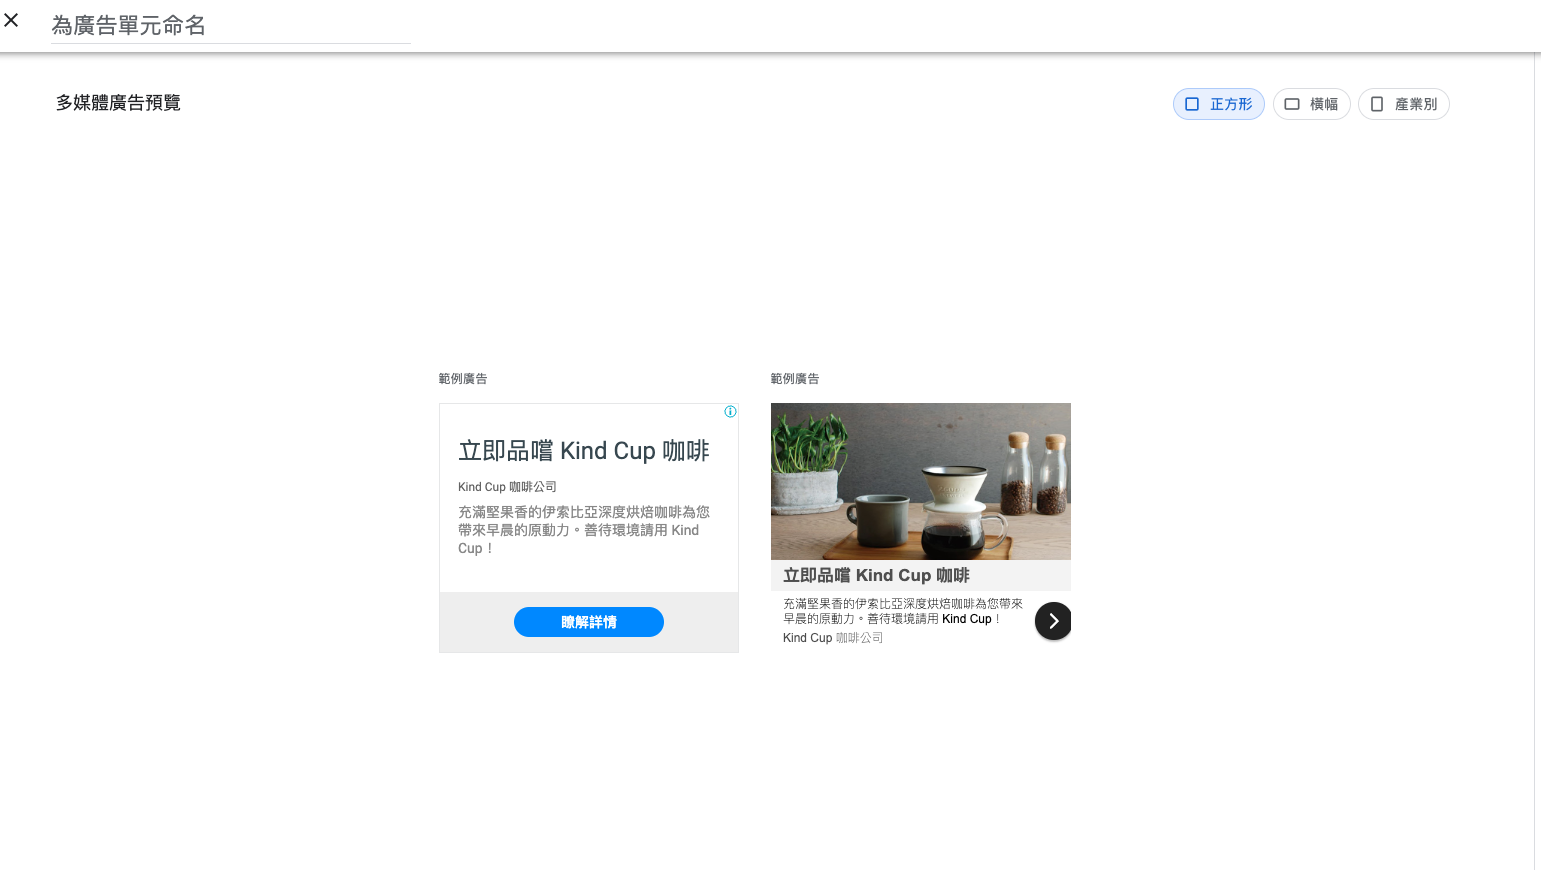
It will allow you to set the shape you want
And preview the approximate appearance of the ad
But you will only know the real look when it is placed on your webpage
Then click Create at the bottom right
It will automatically generate the code for you
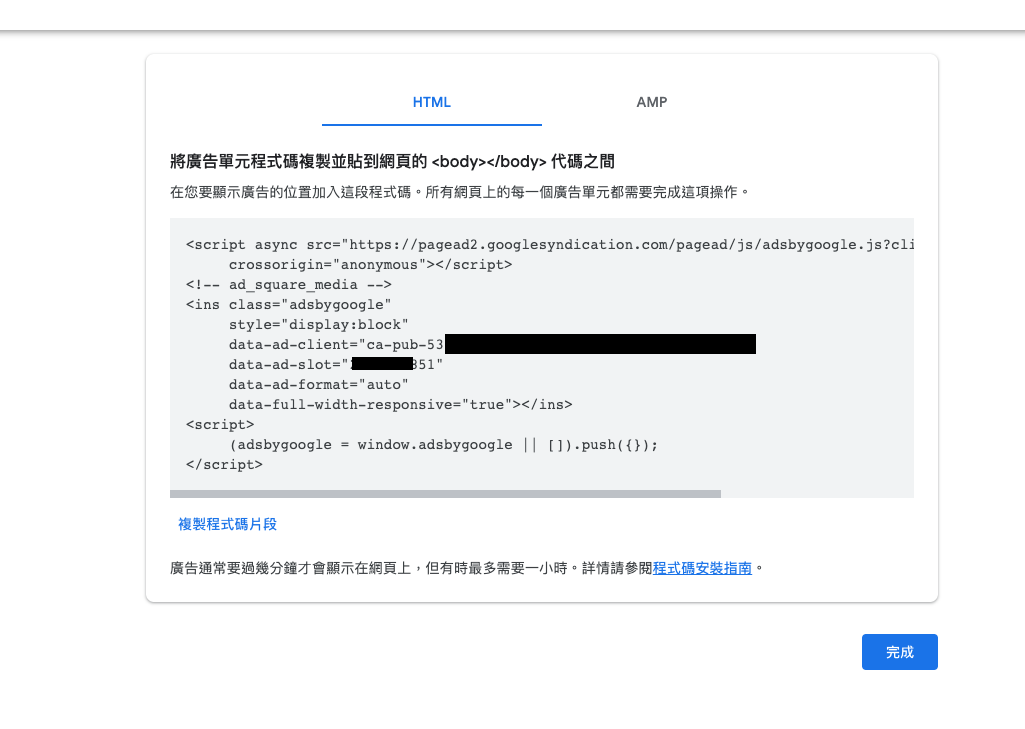
At this point, copy and paste this code
To the position you want on your webpage
You can then customize the arrangement
In-Feed Ads - Image on Top
{% include google/adsense/ad_dynamic_top.html %}Additional Note 1
What is a domain name?Actually, if you want to put your website on the internet for people to browse
You need to have an open IP address first
Then put your website in the root directory of the open IP
And run your server (if you have one)
Or at the very least, put an index.html file or .txt file so others can browse it with a browser
At this point, if you don't want others to connect using the IP
(Sometimes for user convenience, future server migration considerations, etc.)
You can find a domain name to replace your IP address
So that users can connect using an easy-to-remember URL
Usually
You can rent from some third-party domain name rental websites
Or use some third-party website providers
That offer a complete set of services
But if you have the ability to do everything yourself
It is, of course, the most cost-effective