Android Kotlin Tutorial: Decoding Google Maps Polyline Paths and Drawing Lines
Recently,
there was a requirement to draw the estimated path between two latitudes and longitudes on Google Map.
The method to achieve this is to first input two latitudes or addresses on Google Map,
obtain the path JSON format returned by the official Google API,
then parse the JSON content,
and use the data to draw the route.
Below is part of the JSON content:
(Since the JSON data is quite large when the route is long, only a part is shown)
But if you want to see the complete JSON file, you can click here to view it.
However, our requirement is to draw the entire driving route, so we plan to use the JSON data obtained just now, and have summarized a few tips as follows:
- The data related to the path is located in the routes array within the JSON.
- The routes contain the estimated directions.
Just like when using Google Map navigation,
the app will tell you
to turn left/right in 500m, etc. - Our focus this time is to draw the route between two points.
So we can directly obtain theroutes>overview_polyline>pointsin the JSON format.
It contains a string encoded and compressed by Google.
(If you are interested in the encoding algorithm, you can check the official Google algorithm)
Google Official Polyline Encoder Utility
Here we will use
Maps JavaScript API
to get a string of non-plaintext data.
This string represents the path between the two points we want to draw.
Because Google has encoded it.
After reading the above document, I share the decoding process in sequence as follows:
- Convert each value to its equivalent ASCII
- Add the ASCII of “?” to each value (which is 63, the ASCII of ? is 63)
- Perform a logical AND operation on each value with 0x20
- Reverse the address
- Left shift the address
- Convert to binary
- Multiply the original latitude and longitude by 1e5…
The official Google document mentions
that the main reason is to reduce the space consumption caused by a large amount of data during transmission.
So the data is compressed.
To solve this problem, we have to find a way to decode it,
and expect to get the latitude and longitude of the entire route after decoding.
The implementation method is very simple.
Follow the reverse encoding process mentioned in the official Google algorithm.
Take the polyline encode obtained and decode it in reverse steps,
then you can get the array of latitudes and longitudes to be applied.
So theoretically, it can be implemented in any language/platform.
First, parse the JSON obtained just now.
I will not show the JSON parsing process here,
as many people are already familiar with it!
Next, we take the polyline encode obtained from Google
(points in the overview_polyline within routes):
Following the official website’s process, write the decode function (Kotlin version).
Here is an example I wrote in Kotlin.
You can modify it according to your needs.
(For example, modifying the returned model, etc.):
Here is an important point: after reversing the polyline encoding, the returned latitude and longitude are reversed, so when processing the latitude and longitude data, remember to reverse the positions.
Step two, pass the obtained polyline encode into the decode function:
After decoding, you can get a format similar to the one below.
With this, we get the array of latitudes and longitudes we want to draw a line with, and we can use PolylineOption on Google Maps to draw the line:
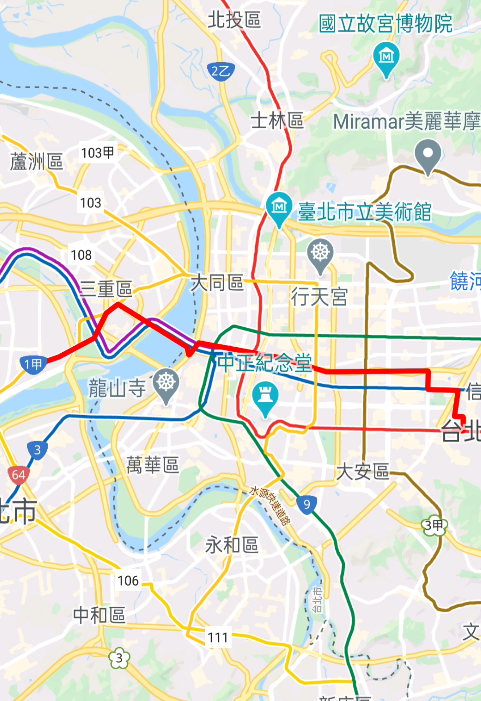
The final result of the drawing is as shown in the picture (red path):
Additionally, here is a website that allows you to decode online,
so you can test if your decode results are correct during development.
If you think my article has helped you, please don’t hesitate to give me some encouragement!