Create Your Own LINE Chatbot! A Beginner's Guide to Building with Kotlin Ktor
Due to my love for the Kotlin language, I spent some time researching the Ktor library,
and in my spare time, I created a small side project.
This project is a server written in Ktor, used to connect to a LINE chatbot.
This article aims to set up a custom server using Kotlin Ktor,
which can connect to a LINE chatbot to achieve automatic message replies.
Here we demonstrate how to use Kotlin to connect some APIs and web crawlers to get the price of trading pairs and images from the web.
based on a Kotlin Ktor server.
Ktor is a simple and easy-to-use framework,
which can be used to build different applications.
Its scalability and high performance make it a good choice.
Through the introduction in this article,
you will learn how to build your server using Kotlin and Ktor,
and connect to a LINE chatbot.
We will set up the environment through Gradle and reference some necessary libraries.
First, create a Ktor project.
I used the Ktor plugin to create it directly.
Many configuration files are already set up for you.
You just need to understand what each one does.
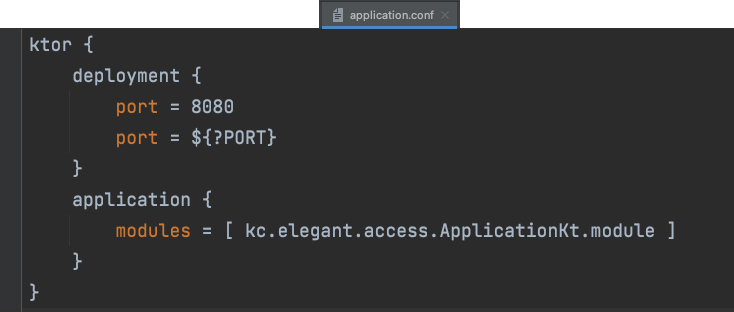
First,
create an application.conf file in the root directory,
mainly used to set Ktor-related parameters,
such as the port number and the package path of the main program’s Application.module.
Next, create an application.kt file
fun main(args: Array<String>): Unit = io.ktor.server.netty.EngineMain.main(args)
This code mainly describes that Ktor uses Netty’s engine,
so it needs to point to main(),
but Ktor also supports other frameworks,
which I haven’t had time to research yet. I might try them in the future.
fun Application.module() {...}
This is the server block that the .conf file points to for execution.
It is written using Kotlin’s extension.
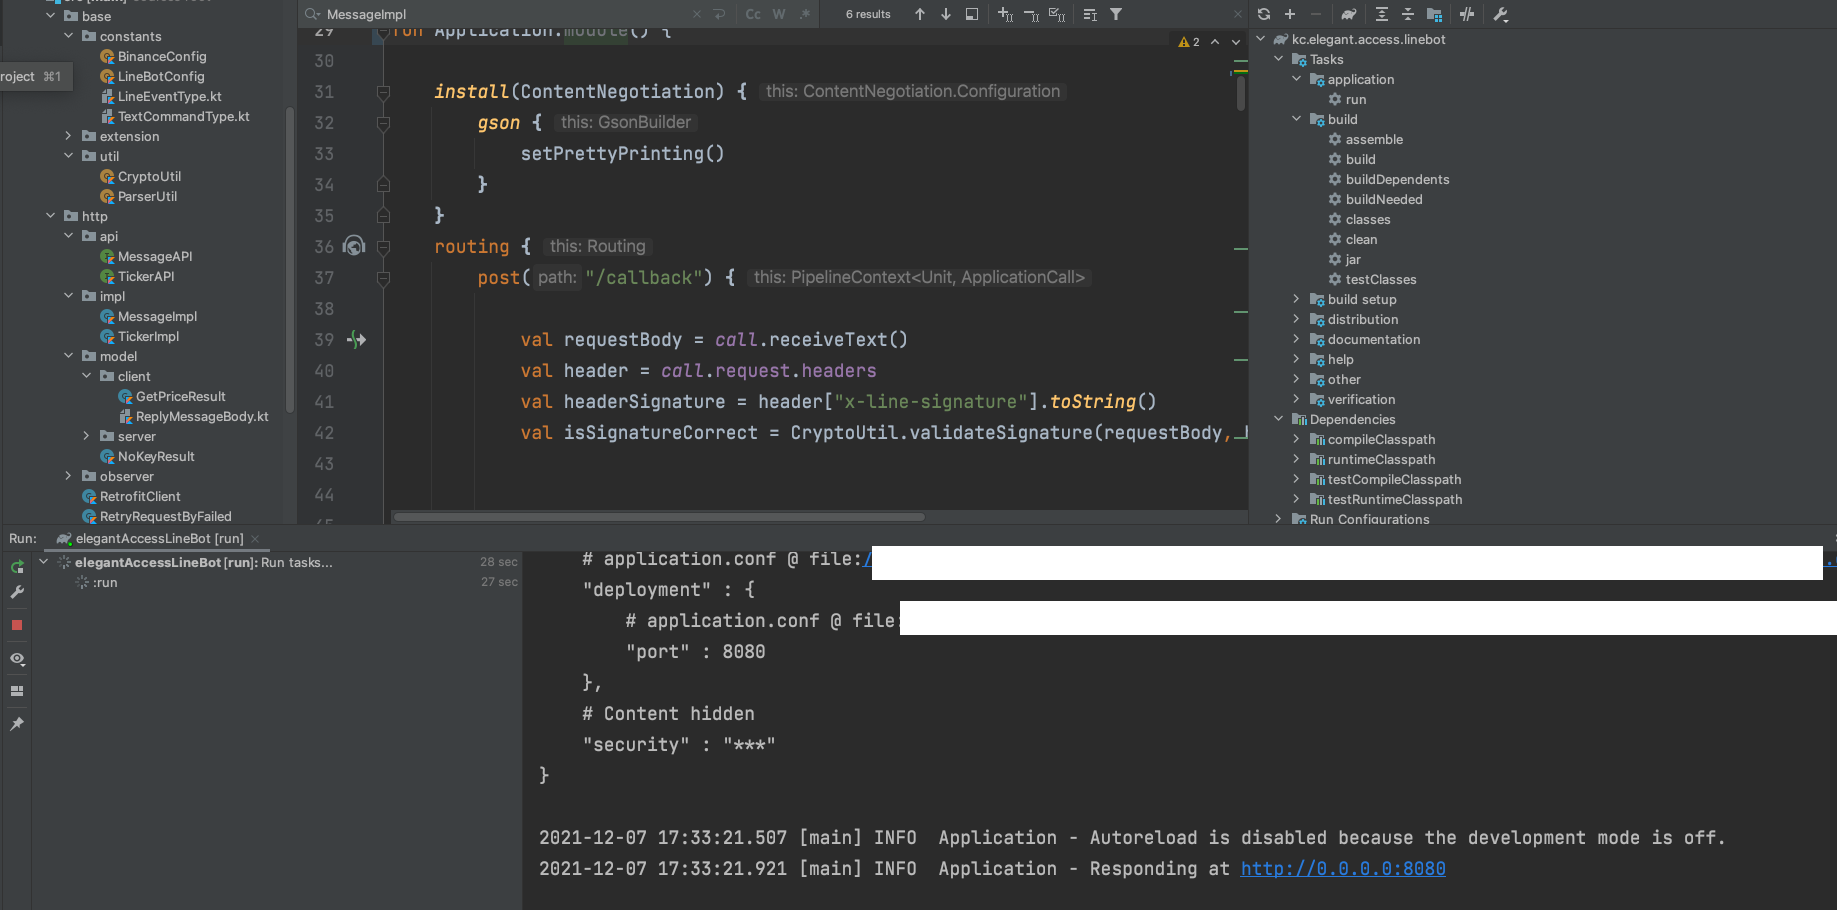
Below is an example of implementation,
where we add the relevant code to enable Ktor to support Gson for parsing JSON.
The purpose is to allow the HTTP server to use Gson to parse data when receiving it.
install(ContentNegotiation) {
        gson {
            setPrettyPrinting()
        }
    }
You can define some API endpoints here,
such as POST, GET, etc., to allow external users to interact with your server by calling the API.
The example below defines an API endpoint named /callback.
routing {
      post("/callback") {...}
}
This section has covered the basic Ktor syntax,
next, you can consider how to deploy your Ktor Server online.
You can choose to use third-party server hosting services,
or you can apply for a fixed IP + Domain Name to set up your own server.
Alternatively, you can do what I did,
I used ngrok, which provides a free 2-hour session,
and generates a fixed Domain Name that you can provide to external users to connect.
If you just want to try it out yourself or let friends play around, you can use this method.
Using ngrok is very simple,
just download the ngrok CLI and add it to your environment variables,
then start the server, and it will generate HTTP and HTTPS connection URLs.
You can modify the port to connect with your Ktor server.
Once installed, simply enter the following command in the terminal (the port can be adjusted as needed)
ngrok http 8080
According to the Line Developer documentation,
when you receive a request from Line’s official server,
you must ensure that the received header x-line-signature is verified with the request body and channel secret using HmacSHA256.
Only when they match,
can you confirm that it is Line’s official server calling your server,
to prevent malicious attacks on your server.
Here is my Kotlin implementation for signature verification
Next, we continue to learn the LINE Developer API,
for example, if you want the LINE bot to automatically reply to messages in the chatroom,
you need to use the following API.
Below is a cURL command for reference,
with cURL, developers can use their preferred language to develop.
curl -v -X POST https://api.line.me/v2/bot/message/reply \
  -H 'Content-Type: application/json' \
  -H 'Authorization: Bearer {channel access token}' \
  -d '{
    "replyToken":"nHuyWiB7yP5Zw52FIkcQobQuGDXCTA",
    "messages":[
        {
            "type":"text",
            "text":"Hello, user"
        },
        {
            "type":"text",
            "text":"May I help you?"
        }
    ]
  }'
Additionally, if you want to connect to some of your own services or third-party packages,
you can call the package first,
and then reply to the line-bot-server.
The same goes for web scraping,
scrape the data and then call the official API.
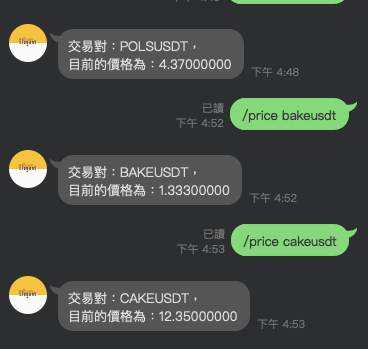
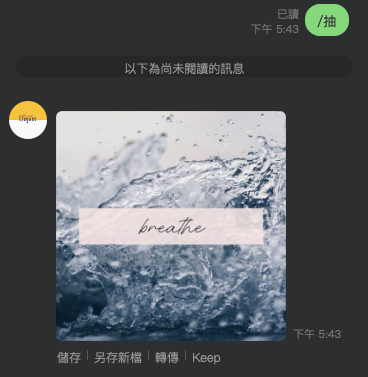
For example, I created some commands,
when receiving the corresponding command,
it will perform the related processing.
enum class TextCommandType(var type: String){
    MESSAGE_PICK_UP("/抽 "),
    MESSAGE_HELP("/help "),
    MESSAGE_PICK_NAME("/pick " ),
    MESSAGE_PRICE_CRYPTO_TRADE_ID("/price " ),
    MESSAGE_NOT_CONTAIN("")
  }
Here is an example,
mainly showing how one of the commands fetches data from a third-party API to get trading pairs.
In fact, the implementation of each command is quite similar,
just write the behavior you want to execute under the specified command,
and then return the result.