Embrace Wireless: A Guide to Using ADB for Wireless Connection to Android Devices!
This article primarily documents how to use the adb wifi CLI to connect to an Android phone.
It is suitable for users who want to develop and debug in a wireless network environment.
In the past, we often used the features of Android Studio to connect phones,
but using adb wifi is also a good method.
Therefore, I specifically searched for related information and compiled it into notes,
for my future reference and to hopefully help other users!
 Unleash the Power of Android 11 ADB Wireless Debug: From Wired to Wireless, Explore a Freer Debugging Experience!
- Ensure the computer and Android phone are on the same local network.
- Connect the Android phone to the computer using a USB cable and enable developer mode.
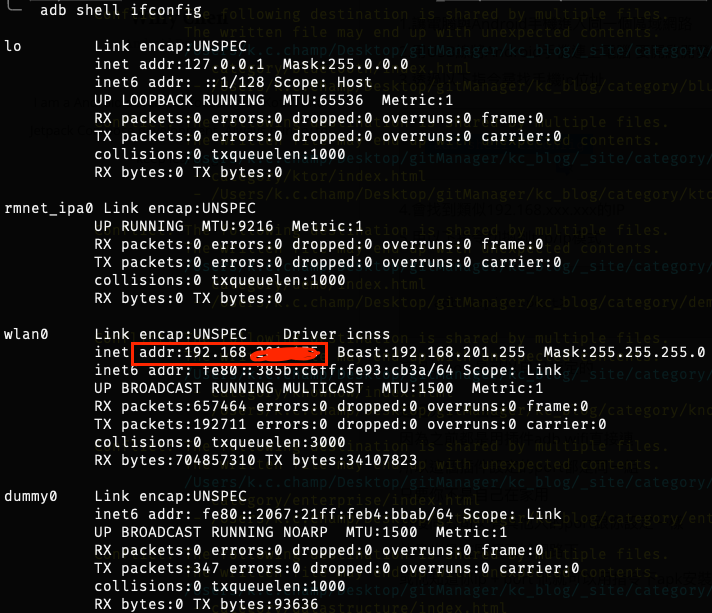
- Use the following command to find the phone’s IP address:
adb shell ifconfig
- You will find an IP similar to 192.168.xxx.xxx.
- Use the following command to switch to TCP/IP mode:
adb tcpip <port>-> You can specify the port yourself.
- Finally, use the command:
adb connect 192.168.0.101:5555(5555 is the port you set earlier) At this point, you can control your phone using adb wifi.
Supplement: Later, I encountered a method to connect to an Android TV, but there was no USB slot available. In this case, you can go to Settings -> Wi-Fi -> find the IP under the same network, so you don’t need to use commands.
Previously, I always used the adb wifi plugin downloaded from Android Studio to connect to the phone (the effect of this plugin is the same as above).
Since the port set by the plugin is always the same,
and others in the company also use the same port settings or the same plugin,
if you don’t change the port,
and your IP happens to be assigned to a colleague’s old IP,
there is a chance that using the command on the same local network,
you can install APKs on your phone through your IP and port.
However, this happens occasionally.
You can use scrcpy to see what others are doing XD (just kidding).
So it’s better to set different ports.
- Additional details for adb connection below Android 10:
-
To connect using
adb connect, you need to connect the USB cable at least once to set your TCP/IP port. After that, you can connect directly with the same IP and port without the cable. - Some so-called adb wifi plugins usually have a default port of 5555, so if the phone has already set the adb TCP/IP port,
someone on the same network who knows your IP can easily try to connect and control the phone.
(Tested here, if
adb tcpipis not set, using the default 5555 will be refused)
- To disconnect, use
adb disconnect <ip>:<port>. - It mainly operates under the adb server, using
adb kill-serverwill also disconnect. - To find the phone’s local IP, you can use
adb shell ifconfig, which will show something similar:wlan0 Link encap:Ethernet HWaddr F0:XX:B7:XX:XX:97 inet addr:192.168.X01.XXX Bcast:192.XXX.X01.255 Mask:255.255.255.0 inet6 addr: fe80::fxxxx:x2xx:fee1:7d97/64 Scope: Link UP BROADCAST RUNNING MULTICAST MTU:1500 Metric:1 RX packets:543 errors:0 dropped:0 overruns:0 frame:0 TX packets:574 errors:0 dropped:0 overruns:0 carrier:0 collisions:0 txqueuelen:1000 RX bytes:198035 TX bytes:125461or use this CLI
adb shell ip route | awk '{print $9}'to directly get the target IP.

-
It looks like you haven’t pasted the Markdown content yet. Please provide the content you want translated, and I’ll handle the translation while adhering to the specified rules.