【Deployment Guide】Migrating Github Pages to Jekyll 4.x and Above - Applicable May 2024
I recently made some modifications to the layout of my website
and wanted to use the rgb() function in CSS
but I found that this feature was not available in Jekyll 3.9.x
which forced me to upgrade the Jekyll version to 4.x and above
After upgrading, I was quite excited
running bundle exec jekyll serve locally for testing
everything seemed to be working fine
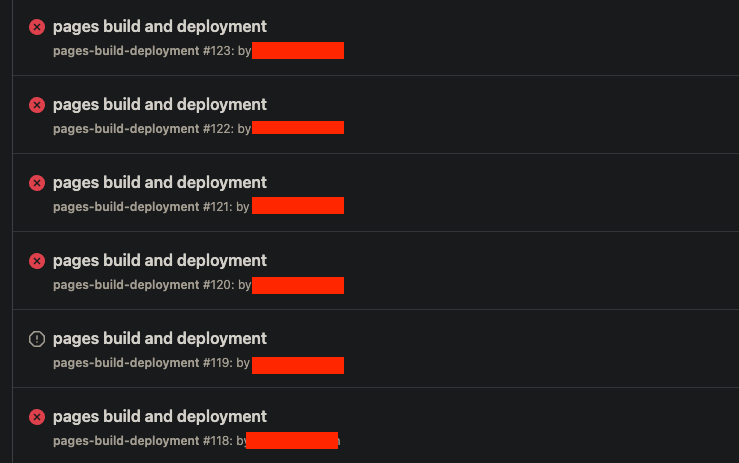
However, when I pushed the changes to the GitHub repository
I encountered some trouble
an error message appeared when deploying to GitHub Pages
GitHub Pages: github-pages v231 GitHub Pages: jekyll v3.9.5

It turned out the problem was with the GitHub Pages configuration
which prevented me from successfully deploying updates with the default configuration
Considering that GitHub Pages is a free service with usage limitations
it makes sense that it does not by default support newer versions of Jekyll
so I had to manually adjust it myself
Below are my notes after multiple failed attempts
finally achieving a build success
sharing with everyone
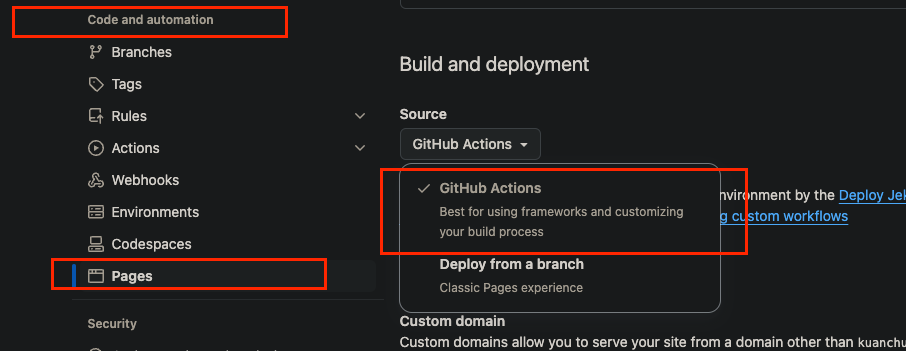
First, go to your deployment repo
and enter the settings page

Then sequentially click on Pages under Code and automation
Select GitHub Actions under Source
Then you need to start configuring your environment…
When building a Jekyll project, you will need Ruby
After installing Ruby, the system will have a default version
When you build Jekyll
without specifying a Ruby version
Jekyll will use the default system version
So use this command to check your version
We need to deploy to GitHub and use Jekyll 4.x
so we need Ruby version 3.2.3
If you don’t have version 3.2.3, you can use some tools to install it
However, since my computer happens to have rbenv installed
I will use rbenv as an example
Of course, you can also use other common command-line tools
such as RVM, chruby, or asdf
Adjust and install Ruby according to your own habits~
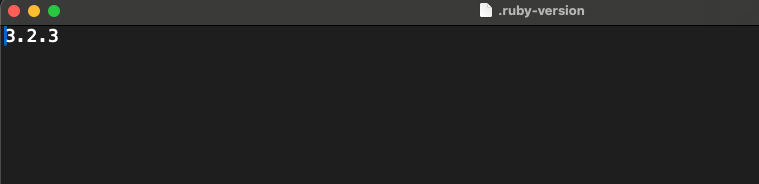
Finally, you need to create a file .ruby-version
in the root directory of your Jekyll project
You can use a command similar to the one below directly
Or you can create it manually if you prefer
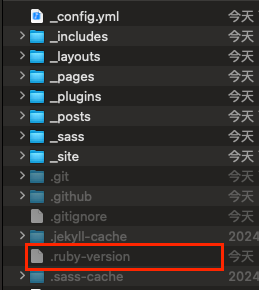
The file content is just the version number
After installing Ruby, start configuring the Jekyll project
First, you need to make the following settings in your Gemfile
Import Ruby version 3.2.3
ruby "3.2.3"
Then set the Jekyll version to use
gem "jekyll", "~> 4.3.3"
The required command is as follows:
Here is the complete configuration
For your reference
Including some Jekyll plugins I use
Add them if you need them
Next, execute the following in your Jekyll root directory
The purpose is to generate the Gemfile.lock file
And ensure your project runs smoothly
After generating, you can use
bundle exec jekyll serve to test if it runs successfully
If successful, the following message will be displayed

Finally,
We need to set up the GitHub auto-deployment configuration file.
Usually, .yml is used for configuration.
Here is the official recommended initial Jekyll configuration: Official Recommendation
All we need to do is modify a few lines in the official recommended .yml file:
- Adjust the target branch:
branches: ["master"] - Specify the current Ruby version:
uses: ruby/setup-ruby@v1 - Ruby version:
ruby-version: '3.2.3'
Here is my final complete .yml configuration
You can use and modify it directly
The steps are actually very simple
You just need to set up the Ruby environment, Jekyll, and GitHub environment
Finally, use git push remote branch to push your patch
This will trigger GitHub Actions to build your website
And with the deployment settings, it will automatically deploy to GitHub Pages
However, the deployment settings are already provided in the official example
The only things you need to change are the Ruby environment and the target branch~
Success
