Android Kotlin: Recreating the Classic Snake Game, Playable in Less Than a Day!
2023, Jun 05
Introduction
In this tutorial
We will learn how to use Android's custom View to implement the classic Snake game.
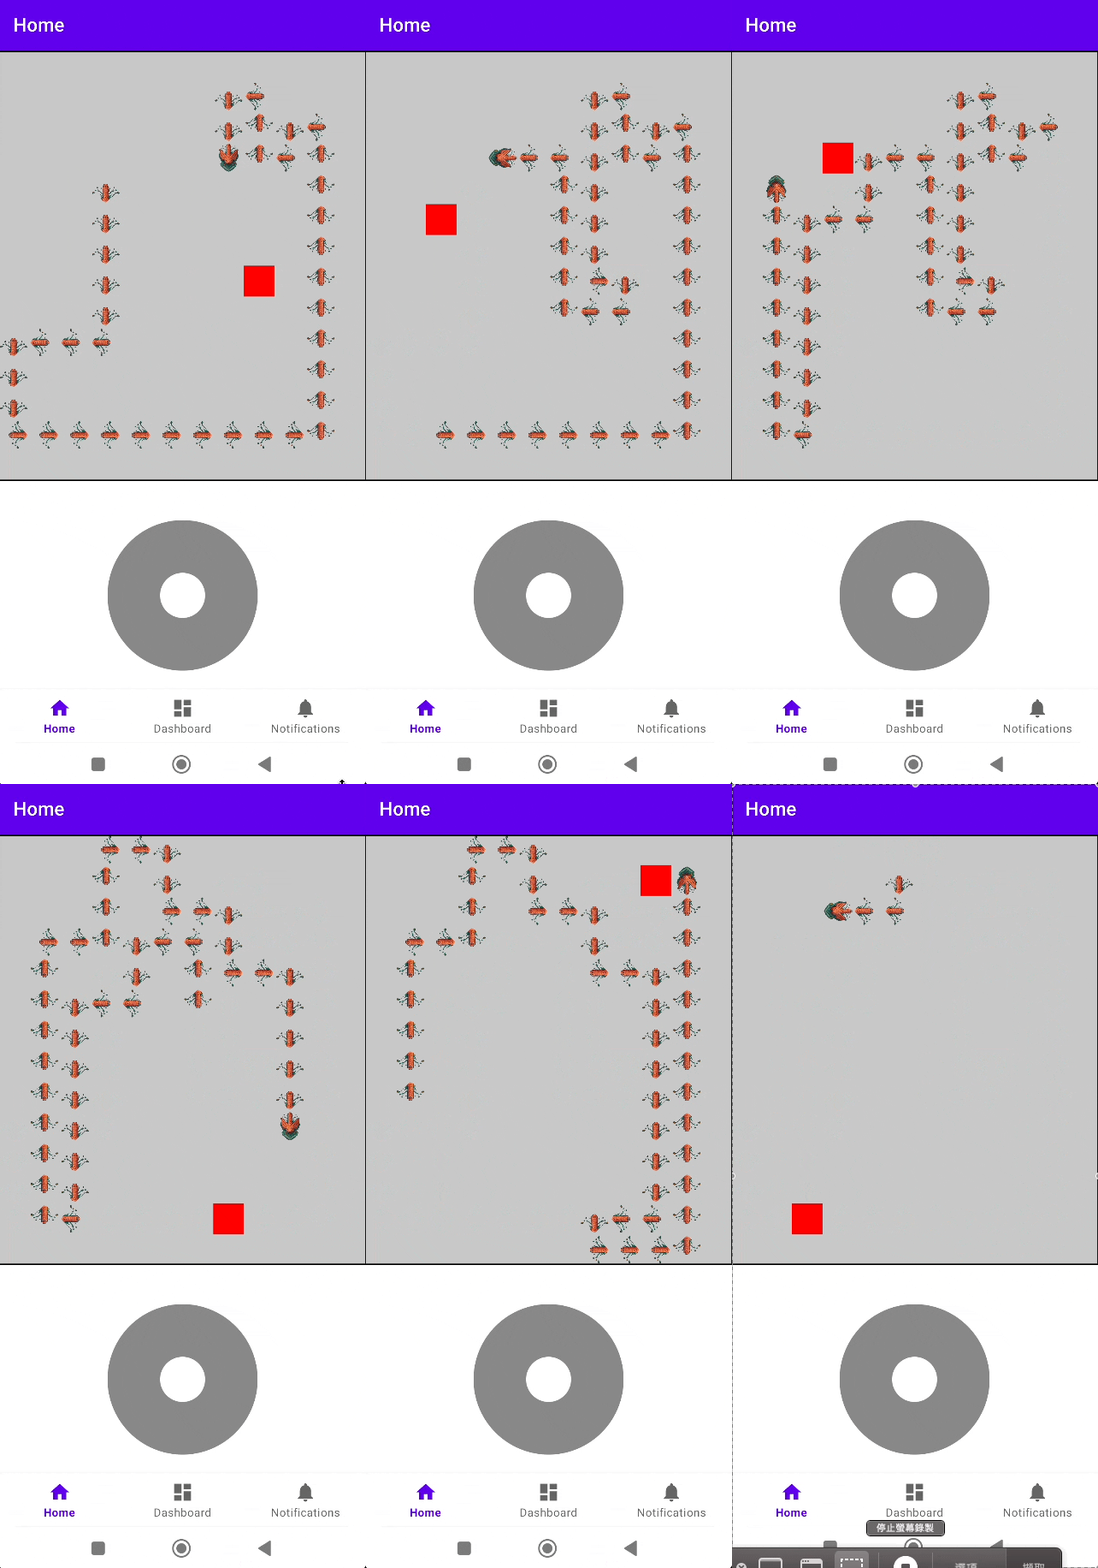
Here are the features we will implement
1. Snake movement and turning2. Random food generation
3. Snake growth after eating food
4. Game reset upon hitting the boundary or itself

Implementing the Snake Game View
Create a custom View class
Code Explanation
First, create a custom View class named SnakeGameView, inheriting from the View class.
Define variables and initialize
Code Explanation
In the SnakeGameView class, define the variables needed for the game, such as the snake's position, size, direction, etc.Below is a brief explanation of each variable's purpose
screenWidth: Canvas width (area where the snake can move)
screenHeight: Canvas height (area where the snake can move)
snakeSize: Size of the snake
snake: Coordinates of the entire snake stored in a LinkedList
food: Coordinates of the food
foodPaint: Style of the food
direction: Direction of the snake's head
score: Score
updateHandler: An interval event to continuously update the snake game screen
snakeHeadBitmap: Bitmap image of the snake's head
snakeBodyBitmap: Bitmap image of the snake's body
borderColor: Border color
borderWidth: Border width
borderPaint: Style of the border
pendingDirection: The direction the snake is about to turn
Set game screen size
Code Explanation
In the SnakeGameView class,we need to override the onMeasure method,
to adjust the game screen size based on the snake's size.
This example demonstrates how to make the game screen adaptive,
so that the snake can fully traverse it.
The main reason is that different brands of phones have varying sizes and densities,
which may cause the set screen size to differ from the snake's width and height,
affecting the game experience. To ensure a consistent user experience, this design is adopted.
Developers can make adjustments according to their own needs.
Drawing the Snake and Food
Code Explanation
In SnakeGameView,in the onDraw method,
we draw the snake and food.
In this example, we use bitmaps to import the snake head and body resources
to customize the appearance of the snake.
Additionally, since the snake will keep moving and needs to change direction,
we use Matrix() + rotationAngle to set the rotation angle.
    val rotationAngle = when (direction) {
      Direction.UP -> 180f
      Direction.DOWN -> 0f
      Direction.LEFT -> 90f
      Direction.RIGHT -> -90f
    }
 val matrix = Matrix()
          matrix.postRotate(rotationAngle, bodyBitmap.width / 2f, bodyBitmap.height / 2f)
          matrix.postTranslate(part.x.toFloat(), part.y.toFloat())
          canvas.drawBitmap(bodyBitmap, matrix, null)
You can also make adjustments according to your needs.
Game Logic
Code Explanation
Add an updateGame method to implement the main game logic, such as snake movement and collision detection.The resetGame() method can be defined to specify what steps to take when the snake hits a wall or itself,
such as displaying a popup, ending the game screen, etc.
Generating Food
Code Explanation
Add a generateFood method to implement the functionality of randomly generating food.Assign the randomly generated x and y coordinates to the previously declared food object.
This way, during onDraw,
the effect of randomly generating food can be achieved.
Updating Direction
Code Explanation
To allow the snake to change direction based on user input,we need to implement an updateDirection method.
Resource Cleanup
Code Explanation
To avoid memory leaks, we need to implement a method to clean up used resources, such as bitmaps.This allows the resources to be released when the activity or fragment lifecycle is resumed.
Connect back to fragment/activity and set button events
Code Explanation
This is the final step,Connect the previously implemented view back to the fragment or activity
Adding interactive buttons will allow you to create an interactive Snake game with the user!
Here, I am using a custom joystickView, or you can use four buttons to move up, down, left, and right