打造流暢Android App跳轉體驗!Navigation with Kotlin 一篇文章就能搞定你的APP跳轉問題!
提供了一種簡單的方式來處理 Android 應用程序中不同fragment之間的導航。
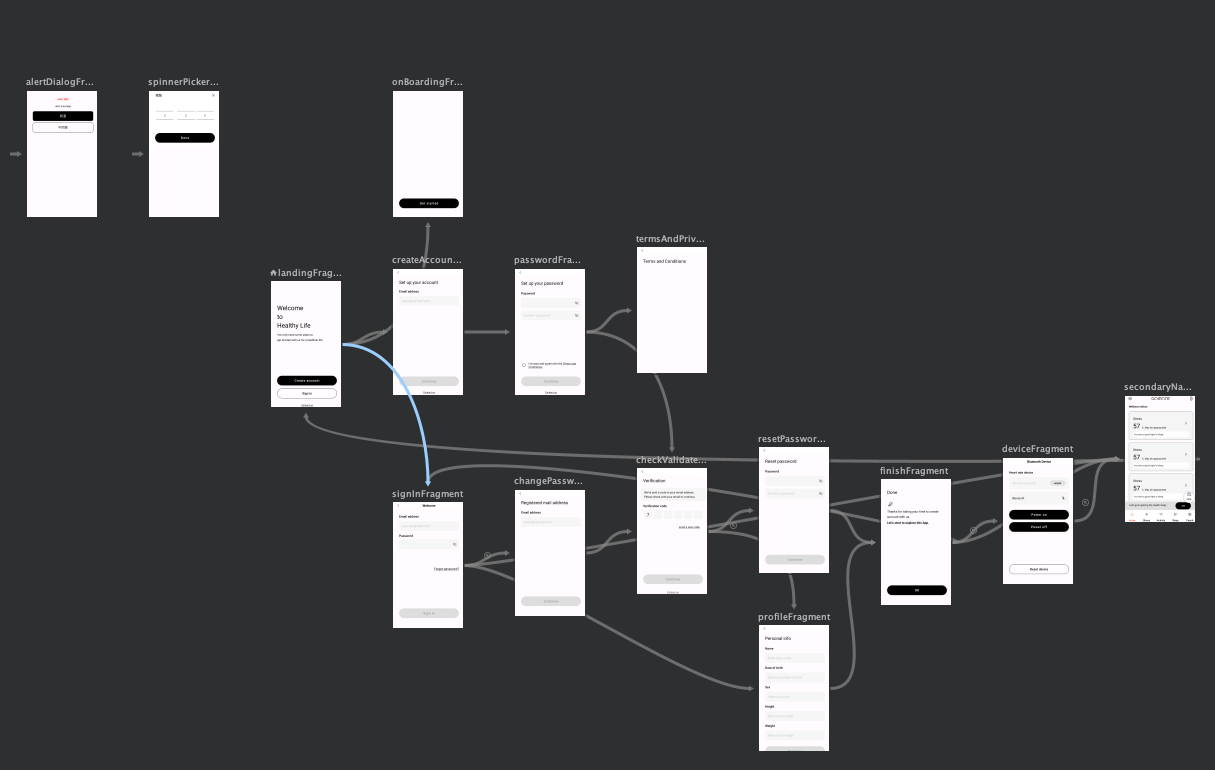
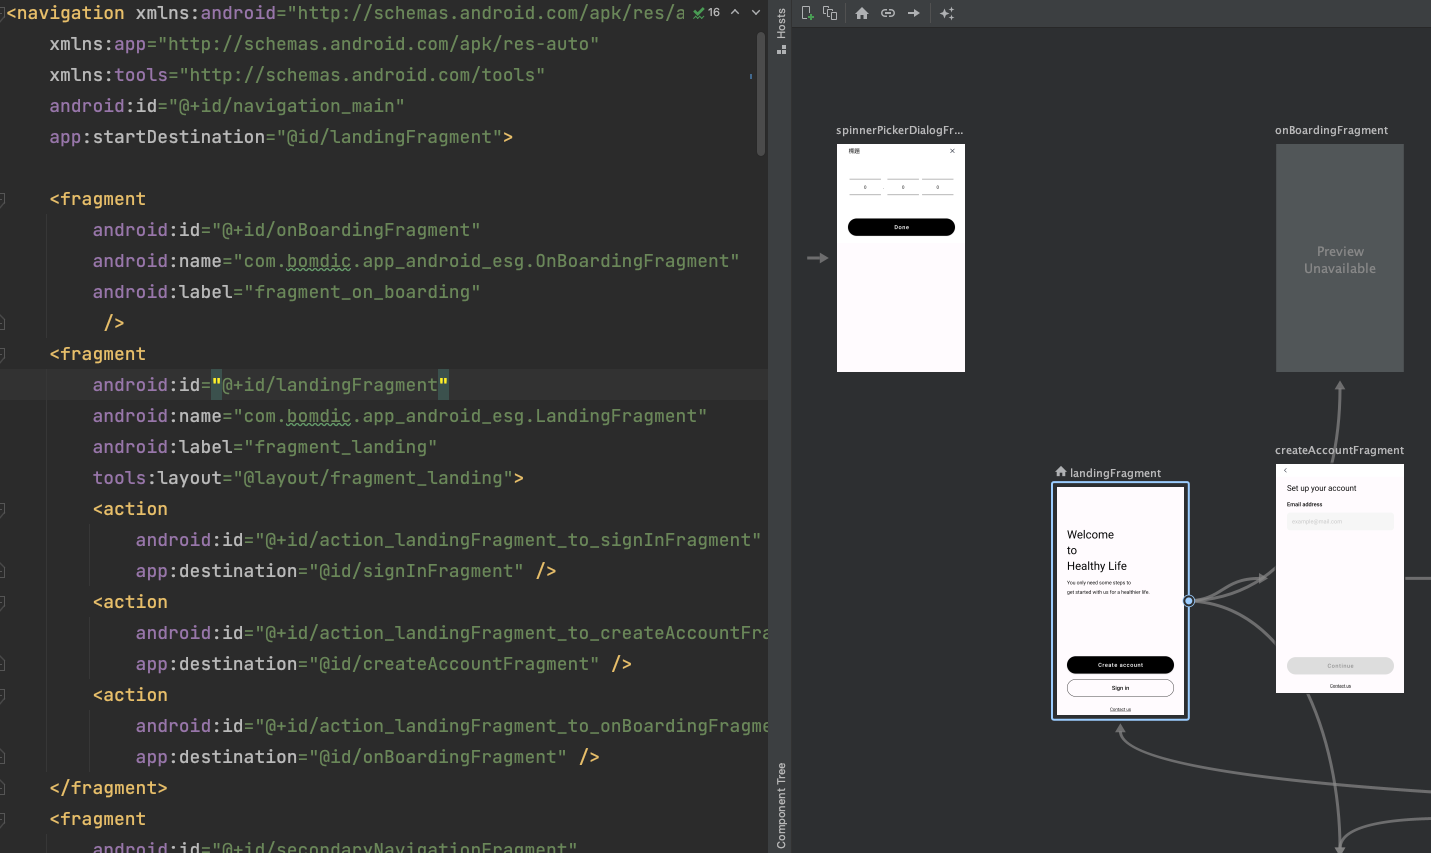
以下圖例
是在專案中導入navigation
並設置跳轉的例子
我們看到當完成一個專案時
可以一目瞭然整個轉案的跳轉邏輯
添加相關library至build.gradle內
注意:「Navigation」 元件必須使用 Android Studio 3.3 或以上版本

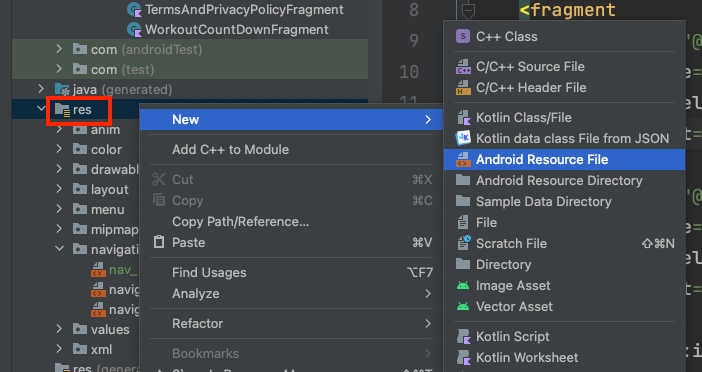
透過Android Studio
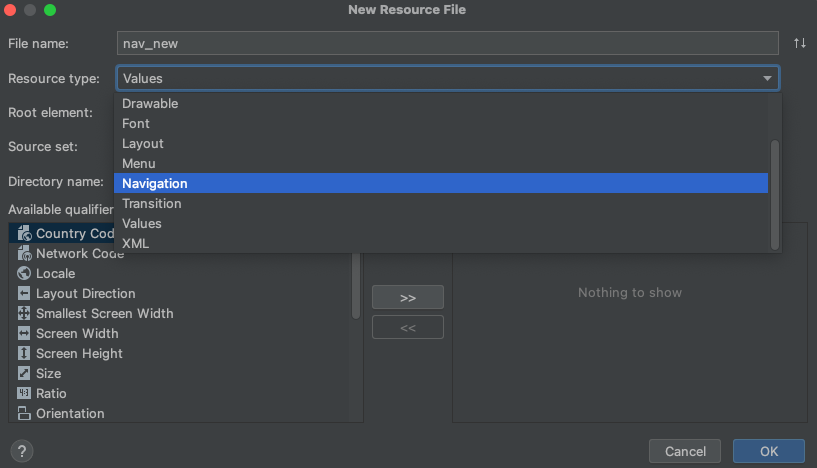
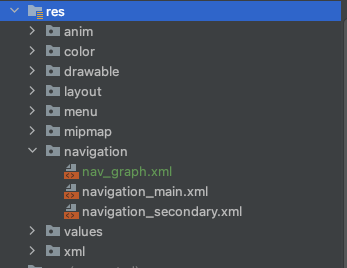
右鍵單擊項目目錄中的 res 文件夾 > New > Android Resource File來新增Navigation xml。
另外如果想純手動加入,也可以在res下建立 navigation folder 裡面新增nav_graph.xml
加入 fragment
id = 命名
name = fragment的path
label = 標示訊息或類似tag
tools:layout = 要預覽顯示的layout xml resource
加入 startDestination
例如:app:startDestination="@id/landingFragment"
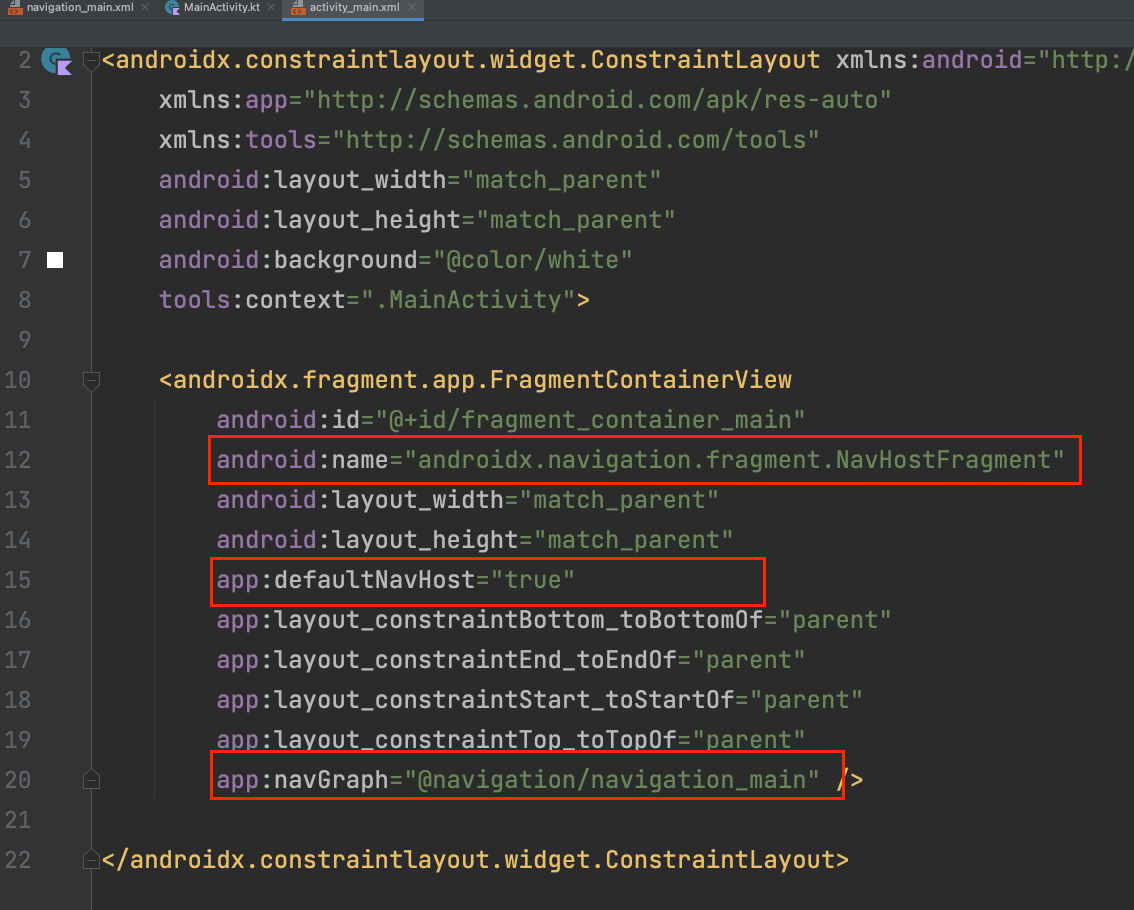
android:name="androidx.navigation.fragment.NavHostFragment"
app:navGraph="@navigation/navigation_main" (選擇性,加了會在IDE預覽)
app:defaultNavHost="true"
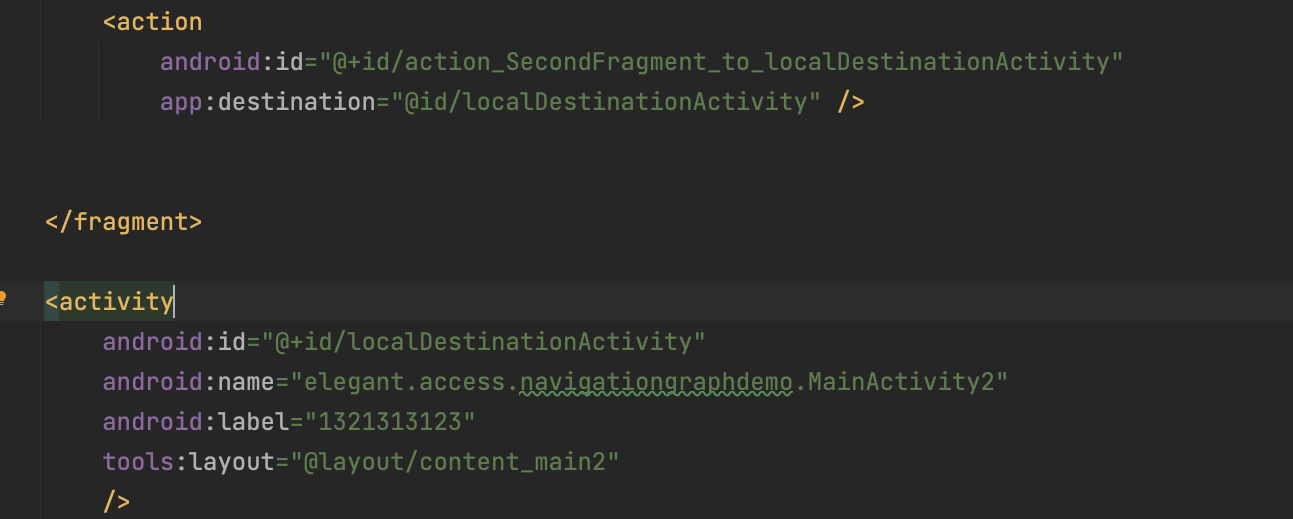
在fragment內 加入action
加入後設定destination
如:app:destination="@id/signInFragment"
(action 寫在外面也可全域跳轉)
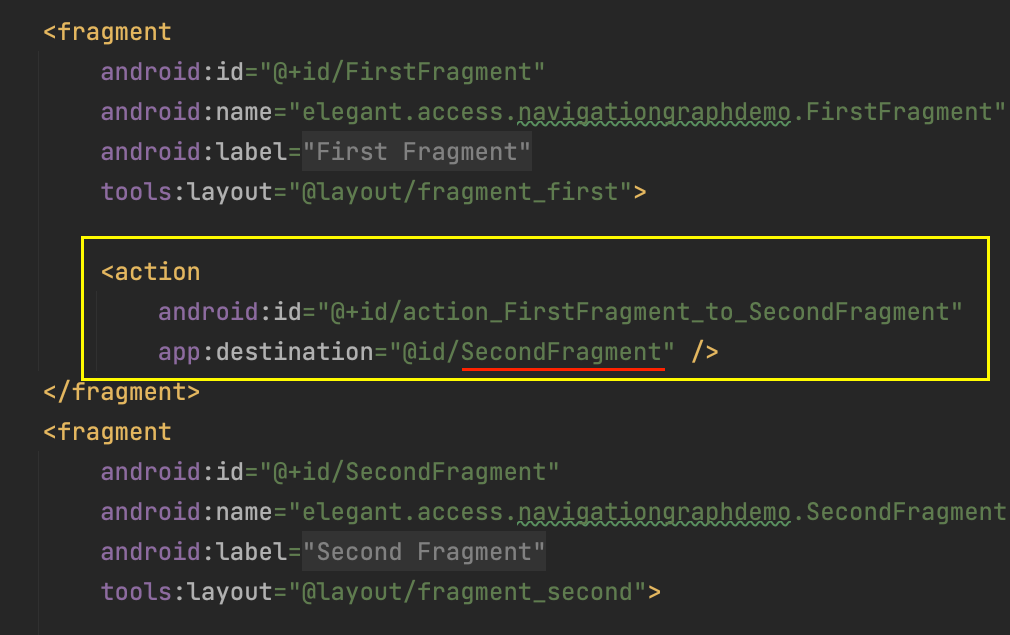
直接在要跳轉的地方加入
findNavController().navigate(R.id.action_FirstFragment_to_SecondFragment)

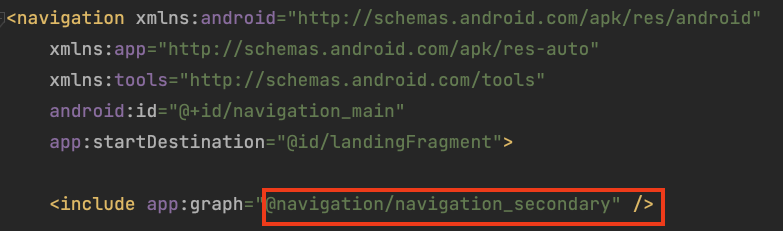
直接再加入一張navigation的方式:
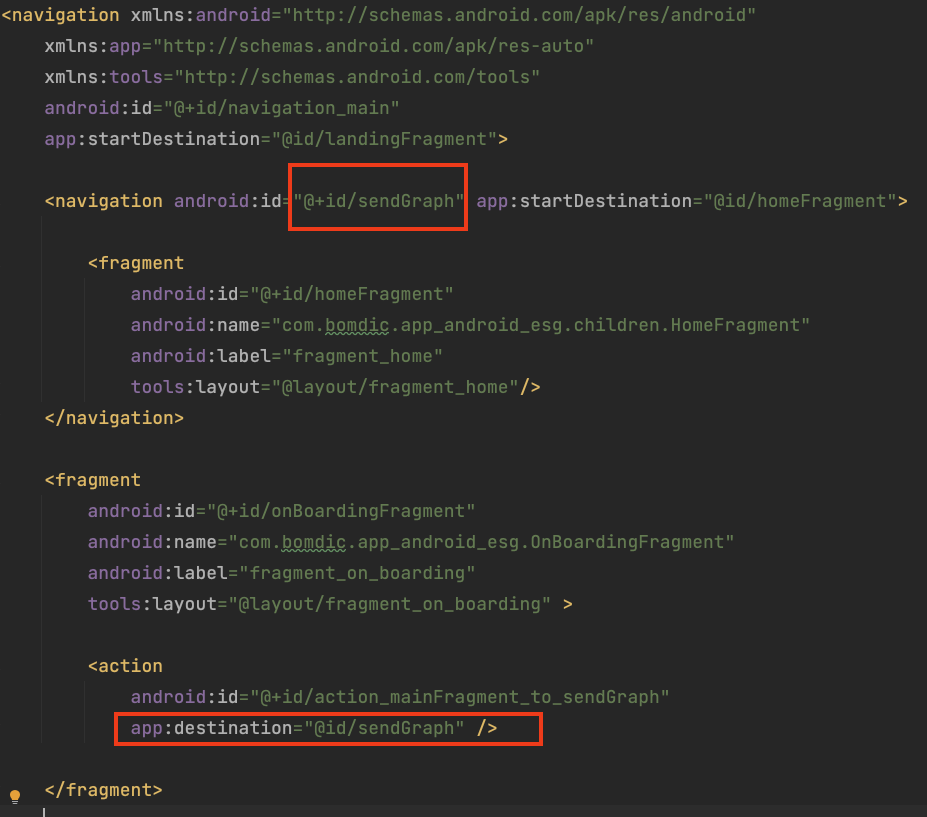
新增一張 nav graph xml後
使用include導入的方式:
跟上面一樣在nav graph 直接加入 dialog tag
並導入你做好的DialogFragment就能用
(id = 命名 , name = fragment的path, label = 標示訊息或類似tag, tools:layout = 要顯示的layout xml resource)

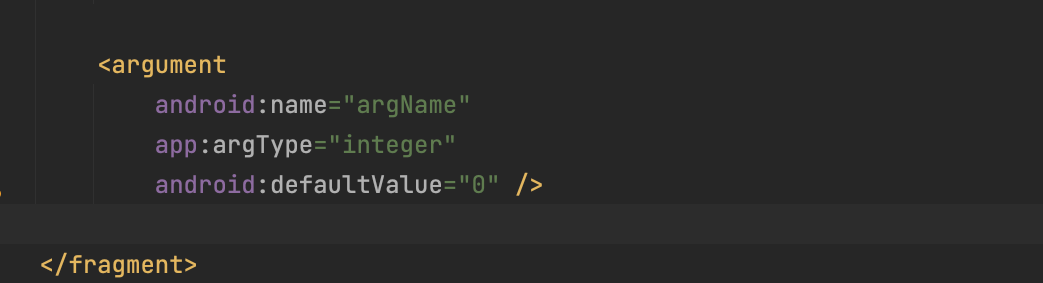
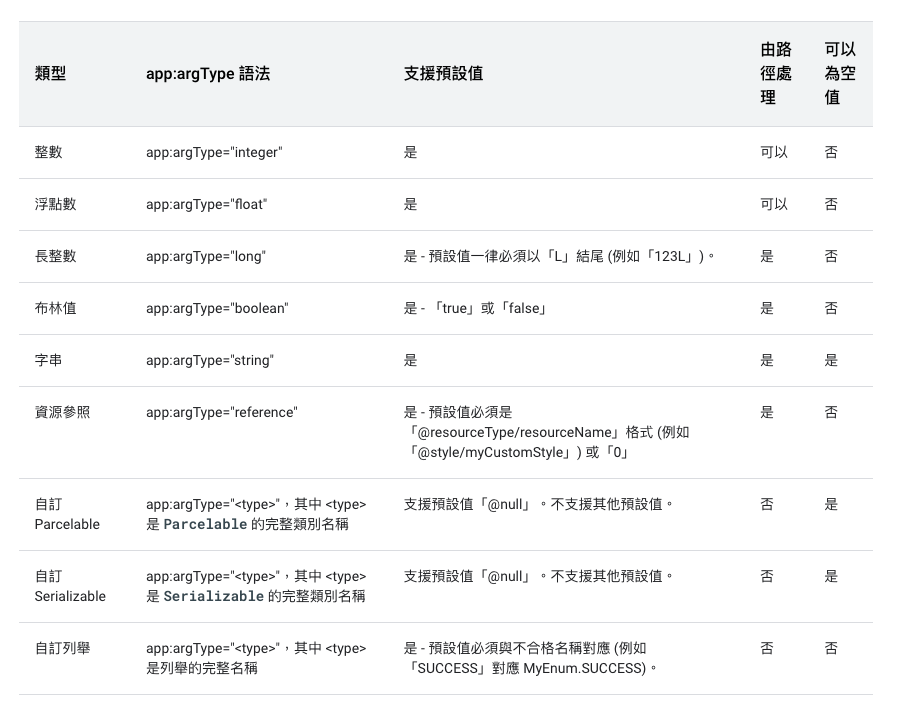
一樣在nav graph 直接加入argument
則可以預設帶入傳遞的變數
(argType = 變數型態, defaultValue = 預設值 )
a. 不使用上面xml的方式預設值
可以下方兩組程式碼直接傳遞變數
b. 如果是有用xml方式帶入預設值的
則可以用下面收變數的程式碼直接接收
帶入 enterAnim, exitAnim, popEnterAnim ,popExitAnim 則可以輕鬆預設跳轉動畫
使用下方code 可以使用navigation內建的activity跳離動畫
透過 Navigation 提供的api讓相關view關聯
便可處理多個back stack跳轉問題
例如setupWithNavController 與bottom navigation view關聯
setupActionBarWithNavController 與action bar關聯
此圖,闡述了一般跳轉邏輯
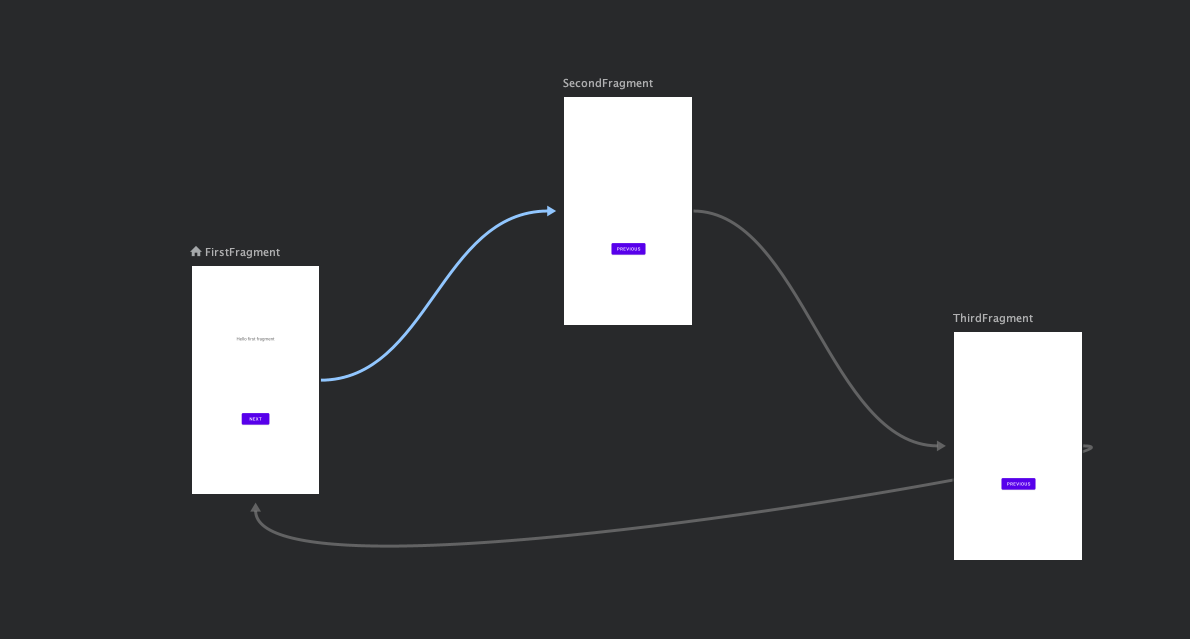
fragment依照順序跳轉 1 -> 2 -> 3 最後再從 3回到1
且再次跳轉 1 -> 2 -> 3 再回到1
此時眾fragment 在back stack內 順序為[1,2,3,1,2,3,1]
若是想要跳轉回1的時候在stack內不再有目的fragment以上的內容可以在xml的action內加入
popUpTo 與 popUpToInclusive
這邊便可以讓下次跳轉回目的地fragment 上方有個stack instance給清除掉
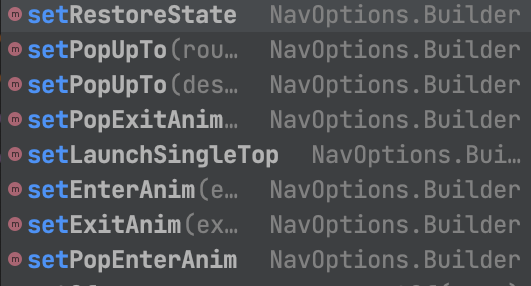
同樣navigation也提供對應builder讓你設置上面講到過的一些功能,NavOptions範例:
val options = NavOptions.Builder()
    .set....
    .build()
最後跳轉時帶入
findNavController().navigate(R.id.action_FirstFragment_to_SecondFragment,null, options)