Compose Multiplatform in Action: Running CMP Projects on Android and iOS Simulators
Compose Multiplatform (CMP)
Yesterday we just set up our CMP project
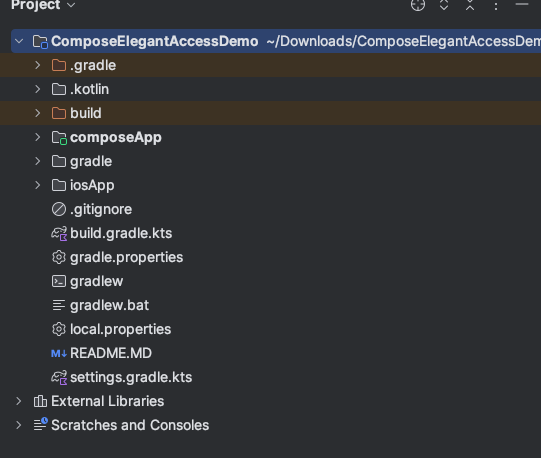
If you’ve successfully imported the project into your IDE
you should see a folder structure similar to this
Now we can try compiling to see if it works
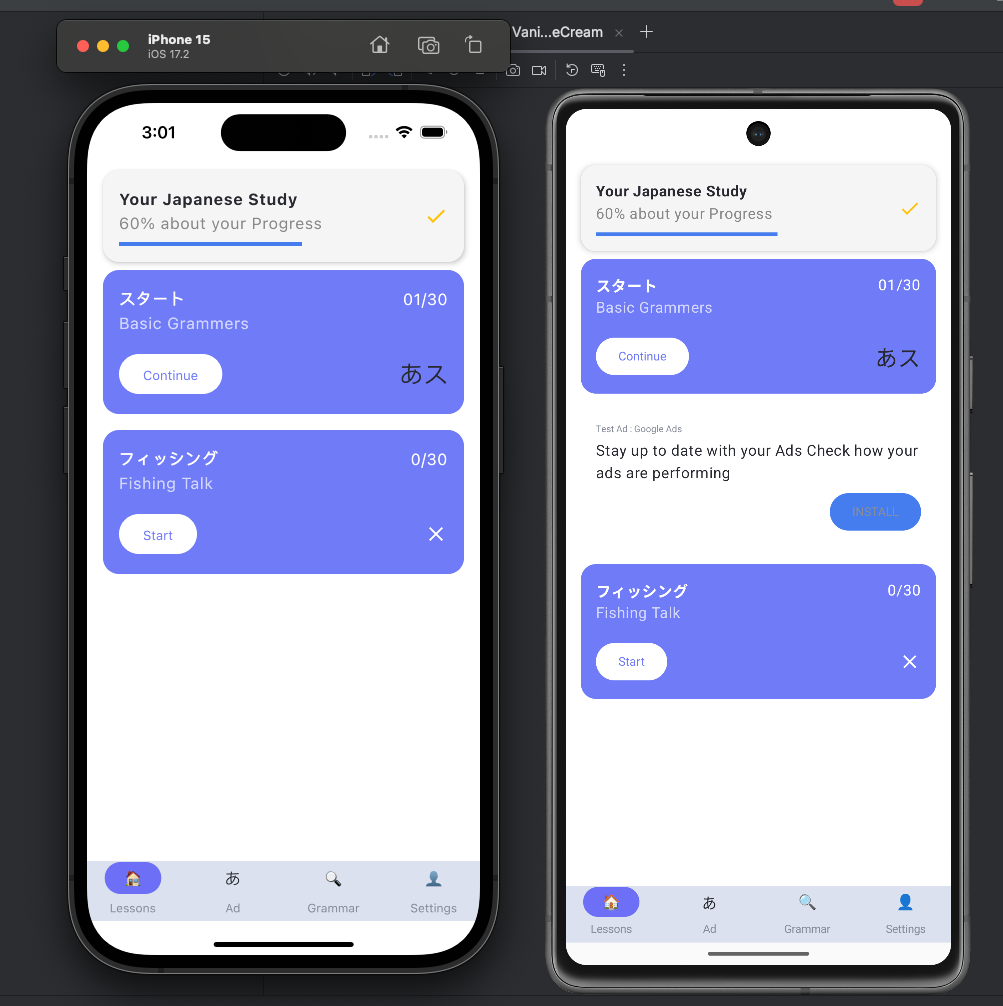
If compilation is successful
you’ll see something like the screen below
with your app running in the simulator
and a success message in the bottom right corner

目錄
- Compose Multiplatform 實戰:放輕鬆點,初探CMP
- Compose Multiplatform 實戰:初戰,安裝CMP環境吧
- Compose Multiplatform 實戰:續戰,用Wizard創建CMP專案
- Compose Multiplatform 實戰:在Android、iOS模擬器上跑CMP專案
- Compose Multiplatform 實戰:CMP的專案結構理解與編譯配置
- Compose Multiplatform 實戰:CMP中跨平台Android、iOS程式碼的進入點
- Compose Multiplatform 實戰:在CMP的Compose中用Material Design3 Theme
- Compose Multiplatform 實戰:CMP用Compose實作跨平台畫面
- Compose Multiplatform 實戰:使用 expect 和 actual 實現跨平台程式碼
- Compose Multiplatform 實戰:CMP中實作Compose Navigation頁面切換
- Compose Multiplatform 實戰:CMP中透過StateFlow來管理UI狀態
- Compose Multiplatform 實戰:CMP中實作NavigationBar底部欄
- Compose Multiplatform 實戰:CMP中使用koin來依賴注入Dependency Injection
- Compose Multiplatform 實戰:CMP實作跨平台資料庫SqlDelight
- Compose Multiplatform 實戰:CMP中使用ROOM開發跨平台資料庫 & 疑難雜症
If you created your project using yesterday’s method: Creating a CMP Project with Wizard
then all the basic project configurations have been set up for you
You just need to make sure your system environment from Day 2 Setting Up the CMP Environment
is properly installed
including JDK, Kotlin, etc.

Next, to simulate on your computer
you’ll need to create an Android emulator
Click on Tools > Device Manager in the top system bar
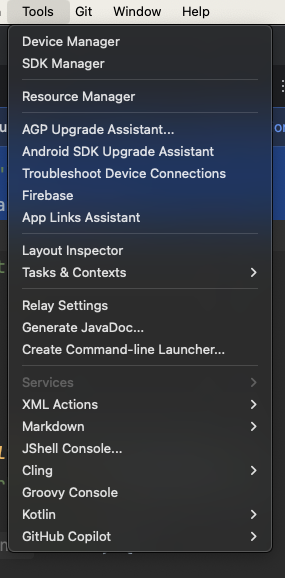
The Device Manager window will appear on the right

Click the + at the top and select Create Virtual Device
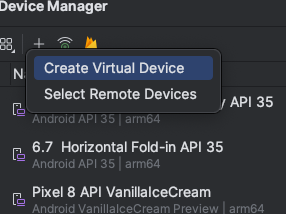
A window will appear allowing you to choose the type of Android emulator you want to create
including Phone, Tablet, TV, Watch, Automotive, etc.
Since Android Studio is primarily maintained by Google
it provides Android Phone AVDs (Android Virtual Devices) with Google Pixel OS for you to download
Of course, you can also download the Pixel AVD images from the Android Developer website
but Google has conveniently integrated them into the IDE
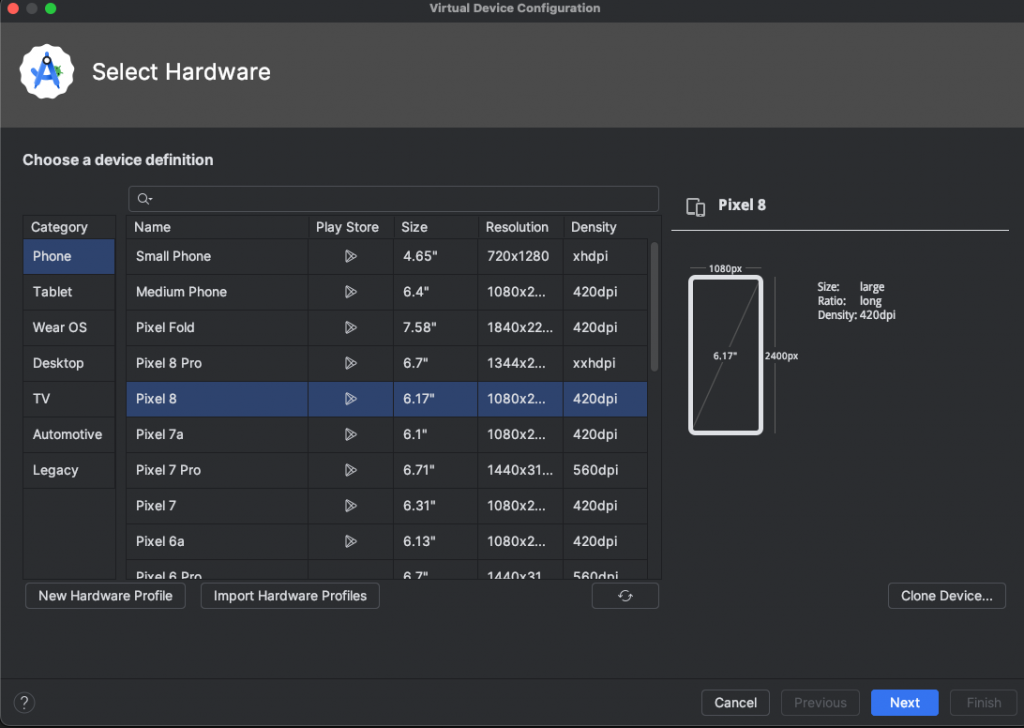
Select your desired Phone and click Next in the bottom right
You’ll then reach the Android SDK selection screen
Choose the SDK version you want to test with
If you haven’t downloaded a particular SDK before
it will appear grayed out with a download icon on the right
Once downloaded, you can select it
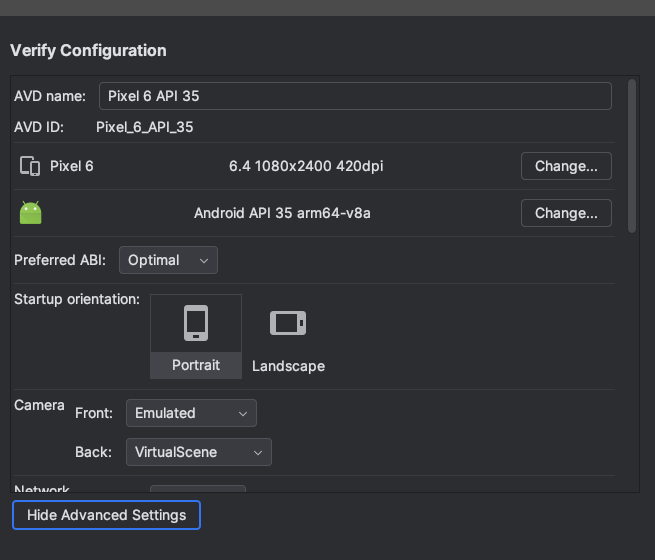
After clicking Next, you can configure the emulator settings
such as: orientation, network, startup settings, RAM size, SDK size, etc.
Once you’re done, click Finish in the bottom right
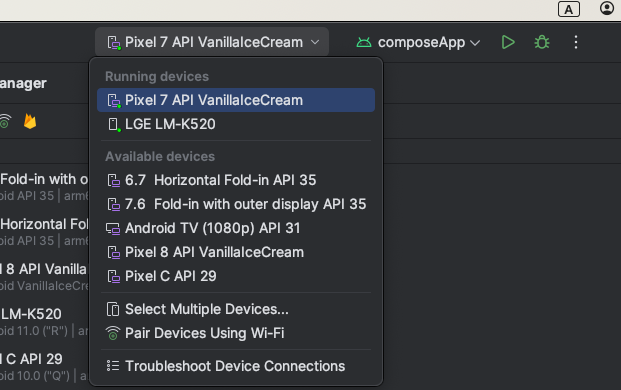
Select the emulator you just created in the dropdown menu at the top
and click the Run project button (looks like a green play button) to let the IDE build and install the app on the emulator
run
./gradlew :yourComposeAppProjectName:assembleDebug
yourComposeAppProjectName is your project name
assembleDebug indicates building a debug version
You can find the .apk file in yourComposeAppProjectName/build/outputs/apk/debug/yourComposeAppProjectName-debug.apk
There are two methods
- Drag and drop the APK into the emulator
- Use a command to install (if using adb on a
real device, you need to enable developer mode)
adb install ../xxx/yourComposeAppProjectName-debug.apk
Make sure you installed Xcode from Day 2 Setting Up the CMP Environment
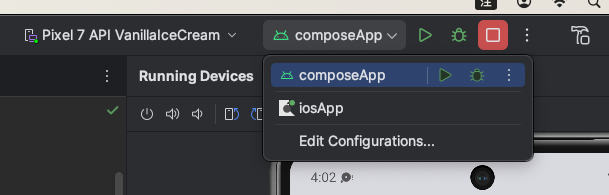
At the top of the Android Studio screen, there’s a dropdown with an Android robot icon
Click to open the dropdown menu
This section contains the Configurations set up in your project
which could be Build Android app, Build iOS app or various gradle tasks, etc.
If this is your first time running an iOS app in Android Studio
there might not be a default Build iOS Configuration
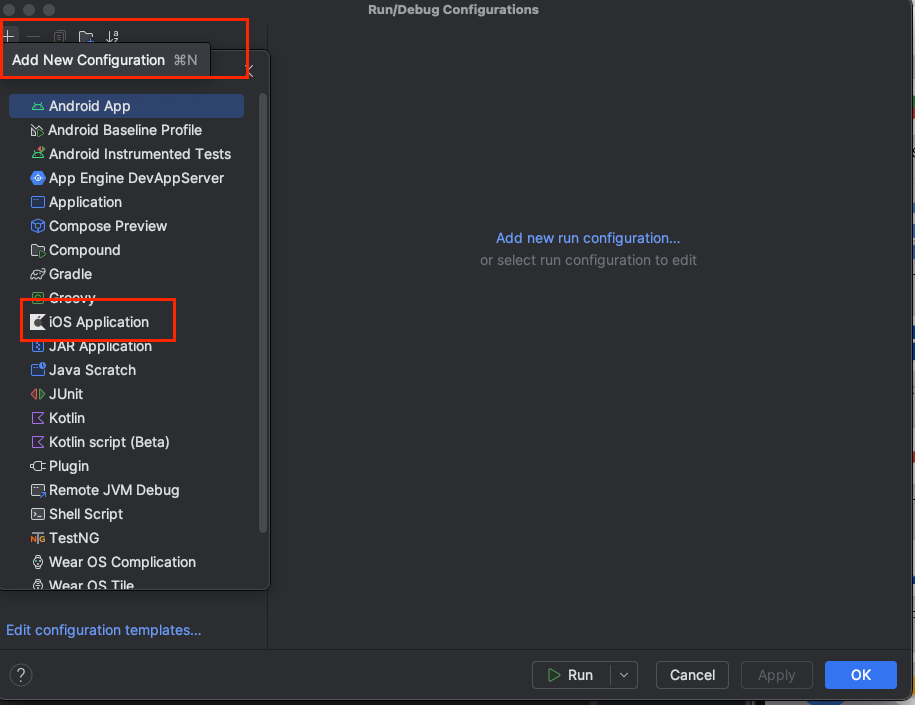
So click Edit Configuration to set it up
Click the + in the top left > iOS Application
Then, based on your needs
a. Set a name for the task
b. For Xcode project file, click the folder icon on the far right
c. In the file selector that appears, select the path to the .xcodeproj file
(Click on the blue highlighted .xcodeproj and then click open)
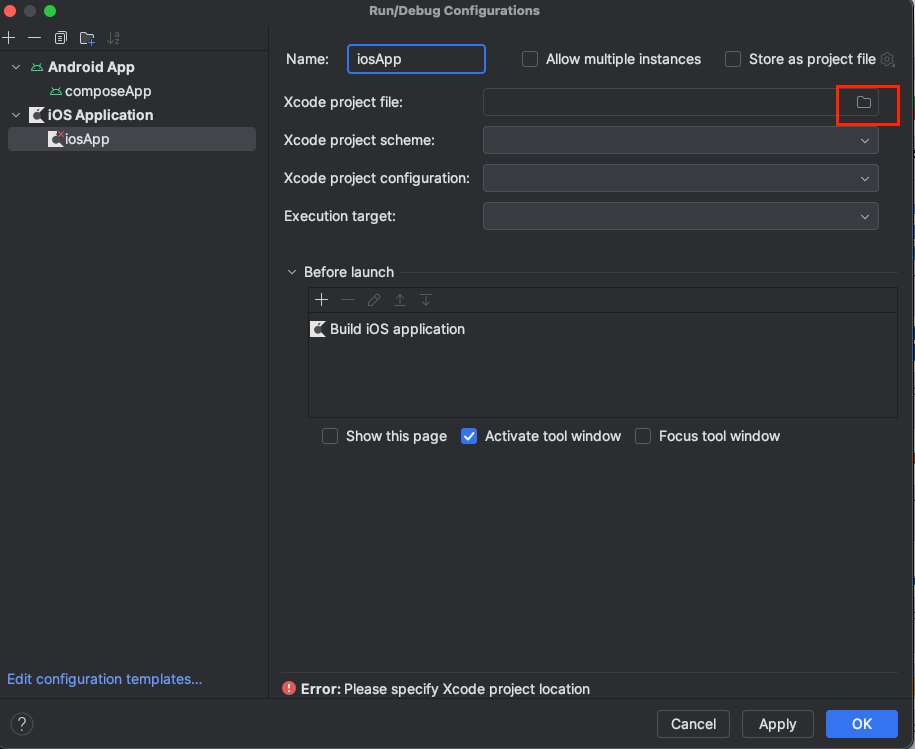
d. After selecting the .xcodeproj path
the IDE will automatically read the scheme and configuration inside
Now you just need to select the target iOS emulator version and model
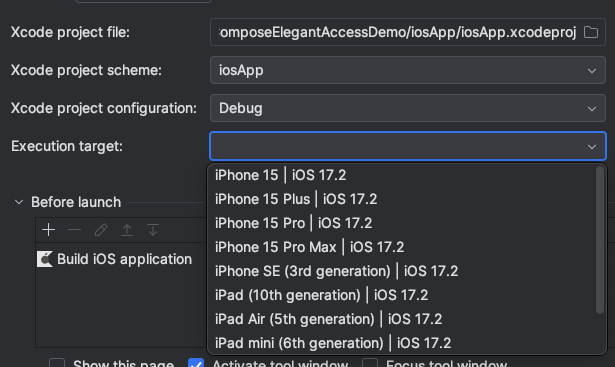
e. Change the Build Configuration to the one you just created
and click the Run button
Since CMP creates the iOS project directly in the root folder
you can simply open the iOSApp folder in your CMP project using Xcode
and build the iOS app directly through Xcode
At this point, you should be able to fully build your CMP project and run it on both Android and iOS simulators
Tomorrow, I’d like to introduce
the CMP project structure and some potential issues you might encounter